02 December 2014

Primitive Christmas Tree in a Jar

Since I'm always looking for new ways to use Mason Jars, I thought I'd try something for Christmas this year. So I found a miniature Christmas Tree and decided to put it in the jar. 

Prim Tree in a Jar

I added some mica flakes for snow and added some rusty tin bells and pip berries inside as well. Then I added some pip berries to the jar and finished it off with a rusty tin star. After I finished it I was thinking it would be neat if it was lit up, so I may have to try that another time. But I think it's still cute this way too.

18 November 2014

Primitive Mitten with Pip Berries Ornie

I was feeling a hint of the Christmas spirit sneaking into my studio over the weekend, so I decided to take advantage of it and make a couple of things. This one is a grungy Primitive Mitten with Pip Berries ornie.

Grungy Primitive Mitten Ornie

I used some dark spray to create a quick grungy effect to the mitten. Then I added some sprigs of Pip Berries. I had a grungy primitive candy cane sitting around in my studio, so I stuck that in the mitten too. And then I added a little star pick and some mini pinecones, and finished off the ornie with a homespun tie. 

I won't be decorating for Christmas until right after Thanksgiving, but it's fun to get in the spirit a little early, don't you think?

10 November 2014

Primitive Fall Decor

Well gang, I haven't been in the studio much recently, since I've been kind of obsessed with working on genealogy of late. I'm sure I'll get back in there at some point soon, but until I do I didn't want you to think I'd forgotten about you. ;) So I snapped a few pics of some of my Primitive Fall Decor to share with you.

This is a Primitive Sheep that I have sitting on my hutch. 
I didn't make it, mind you. It was a gift and I love it.
I put it out every Fall.

Primitive Sheep

This is a centerpiece I have on my dining table. 
Now I DID make this centerpiece myself, quite a few years ago.
It's not really primitive, so I occasionally some prim things around it.
Can you spot the little prim goody in there?

Fall Centerpiece

In case you can't quite see it...it's this cute little Primitive Mouse
sitting on a Primitive Pumpkin!


I don't decorate for Fall as much as I used to, but I do enjoy the few things I do put out around the house.  I have a feeling that once we move to the Farm (hopefully next year) I'll feel like decorating more. But for now I'm content with what I put out each year.  And the less I put out makes it easier to put away, especially with Christmas right around the corner--and I like to decorate right after Thanksgiving whenever possible!  How about you?

20 October 2014

Primitive Sheep Canvas Painting

I really wasn't feeling very crafty over the weekend--I was in painting mode. So since I couldn't think of a new primitive craft to do and share on the blog, I decided to just do a painting instead. Granted, it didn't come out totally primitive, but I had fun with it anyway. This is my little Primitive Sheep canvas painting--just 6" square.

Primitive Sheep Canvas

You can sort of tell that the sheep is primitive, right? But the overall canvas makes it look a bit more whimsical than prim. But that's OK. It was fun to do. And sometimes that's all that matters. :)

29 September 2014

Painted Bottles and Mason Jars

One day last week I saw a post on Facebook about some painted Mason Jars. I've seen painted bottles before, of course, but I really liked the look of the ones I saw last week. So imagine the serendipity of the moment when I was in Michael's over the weekend and happened upon some chalky finish paint by Americana Decor. It was perfect for using on bottles to give them that vintage and aged look. I especially loved the pale mint green color, so I bought a jar of it and decided to give it a go on a couple of things in the studio yesterday.

This first pic shows the paint I used and the painted Mason Jar that I did. I didn't add anything to this jar yet, other than the paint. But I LOVE the finish of the paint. Please note: the color in this photo is NOT accurate. It really is a very pale/pastel mint green color in real life, which I love. So you just have to kind of imagine it the way it should be.

Painted Mason Jar

Americana Decor also has some finishes you can purchase as well to use on top of the paint, but I just opted for the paint this time. I love the color and the chalky finish! I also painted a small milk bottle and added some pip berries and jute to it, to make it a bit more prim looking. Again--remember that this isn't blue, it just looks like it in the photo (I think they did have a blue paint option, but I liked the green more).

Painted Milk Bottle

I'm going to try this on something wood, I think, at some point. It would look great on a shelf or a picture frame or something like that. But I do love the look of the chalky finish on the glass, and these were fun to do.

22 September 2014

Primitive Sunflower Topiary

As I was trying to decide what craft project to do in the studio this weekend, I was walking around the house and spied some grungy fabric sunflower bowl fillers I had in a bowl on my dining table. I grabbed one and decided I would use that somehow in my project, though I didn't know how at that moment. After I got into the studio and looking around in my stash o' stuff, I found a Rusty Tin bucket and knew then that a Primitive Sunflower Topiary would be perfect.

Primitive Sunflower Topiary

I used an old stem from some Pip Berries as the sunflower stem. I used a couple of pip berry sprigs as the leaves. And to the rusty tin bucket I added some Fall-colored homespun for an extra pop of color. Spanish Moss surrounds the flower, which I use a lot in my crafts. And voila: Sunflower Topiary.

15 September 2014

Pumpkin Pickins

I bought some little faux pumpkins at Wally World during the week, so I thought I'd play with them in the studio a bit over the weekend and see what I could do with them. My intention was to grungy them both up to be primitive. But I decided to do different things to each one in the end and came up with two very different pumpkins.

This first one is kind of grungy. I had intended to put cinnamon on it, but then I changed my mind and decided to play with ink instead. I used a dark brown color first because the pumpkin was a very bright orange color. Once I'd gotten that on I took an orange-ish color of Distress Ink and added some highlights back in where needed to contrast with the darker brown. I also used just a wee bit of orange acrylic paint in the pumpkin seams to brighten them back up a little. The result is below--and it does have a bit of a grungy appearance, just not as grungy as I'd  normally do.

Grungy Pumpkin

 This next photo shows the two inks I used to create my grungy effect on my pumpkin.
Ink Supplies

This next pumpkin isn't really grungy--and not really even prim. LOL. But I had fun making it anyway. I used some mat medium as my adhesive, and then I sprinkled on some bronzed mica flakes for a shimmery effect. It's definitely got some sparkle going on! Kind of looks like a Fall fairy came along and sprinkled on some fairy dust. :)

Mica Pumpkin

Mica Flakes

These were fun little pumpkins to make. I love Fall, so it's always fun to make more Fall crafts.

01 September 2014

Grungy Primitive Pumpkin

I saw a post on Facebook recently that showed how to make a small pumpkin using a roll of toilet paper that had been cut in half width-wise, then wrapped with fabric strips. I wanted to try it out for myself, but I really didn't want to waste an entire roll of toilet paper to do it. What can I can say--to me, toilet paper is a valuable commodity. ;) But I knew I had some Styrofoam balls tucked away in my studio, so I decided to give one of those a try. And this was the result. 

Grungy Primitive Pumpkin Decor

I cut a small slice off the top and bottom of the Styrofoam ball to help it sit flat, and look more like a pumpkin. Then I used a fat marker to hollow out a column down the center of the ball, so that I could wrap the fabric strip. I just shoved it down the center of the ball and pushed out the foam.

I used one very long strip of torn fabric--it wasn't muslin, but I'm not even sure what kind of fabric it was. It's just what I had on hand (it's what you see under the pumpkin in the photo as well). I tucked the end of the fabric into the center of the ball and then started wrapping the strip of fabric around and around, overlapping each strip a bit as I went all the way around. Once I got the ball all wrapped with fabric, I tucked the remaining end in the center of the ball too. I somehow managed to tear a strip of fabric that covered the entire ball. I don't think I could have planned that--it was just luck. :)

After that, I picked two colors of spray I had in the studio--one was Glimmer Mist by Tattered Angels in Copper; the other was a dark brown color--I believe it was by Mr. Huey's. I used the Copper color first, since it results in a nice dark orange color on the fabric. I sprayed it all over the pumpkin. Then I just added some of the brown spray here and there to give the color some variation. I dried it all with my heat gun, then went out into the yard and found a stick that could be my pumpkin stem and I stuck it in. 

Voila. Grungy Primitive Pumpkin! You could really make several of these fairly quick and they'd make great table decor for the Fall. You could do more to embellish it, of course. Add some rusty wire, or a leaf, or pip berries, or any number of things really. But I was going to for simplified here. Primitive and rustic. Sometimes that's really all we need.

18 August 2014

Mason Jar Ornie Gift Tag

This is another creation I made by painting an air freshener blank--just like the Faux Primitive Gingerbread Ornie I painted last week. It is shaped like a Mason Jar, which I thought was neat. These come in a plain buff color. So I just had fun painting it to look more like a real Mason jar.

Mason Jar Ornie Hang Tag

I left it kind of plain because after I finished it, I thought this could definitely be an ornie, but it could also be a fun hang tag for a gift too. There's plenty of space to write names on it. I just regular craft acrylics to create this--a soft blue color and some metallic silver. I am not sure what I'll end up doing with it really, but I love how it turned out and it was fun to paint.

11 August 2014

Faux Primitive Gingerbread Ornie

I was looking for some of my muslin bags over the weekend while I was working in my studio. When I finally found the box I was looking for and started digging through it, I found some air freshener blanks I had purchased several years ago (and from where, I cannot recall) inside the box. There were two different packages in there: one was a Mason Jar shape and the other was a Gingerbread shape. Yay! I love finding things in my studio that I forgot I even had. LOL.

Anyhoots, I decided to paint the Gingerbread shape so that he'd look like a Primitive Gingerbread man. And I just love how it turned out.

Primitive Gingerbread Ornie

What's cool about these air freshener blanks is that they are thick and they have texture to them, since of course they are actually made to hold scent. So after painting this one, it really has the look of actual gingerbread. I love it! I painted it brown first, then I grungy'd up the edges with some Distress Ink. And then I used black and white acrylic paint pens to add the embellishments, and I finished it off with a homespun tie. I could easily punch a hole through the top to hang it as an ornie. Or it could be a bowl filler, or sit on a shelf. Such a fun little prim ginger project. :)

21 July 2014

Primitive Sheep Grungy Tag

I felt like making a Primitive Hangtag over the weekend, and since I didn't have time to do much crafting after a full day of painting in my studio, this was the perfect solution to a quick prim craft project.

Primitive Sheep Grungy Tag

Just a simple grungy'd up hang tag that I stamped with a cute Primitive Sheep stamp, and then I embellished it just a bit around the edges with a black pen. Cute and prim, and super easy!

14 July 2014

Simple Ditty Bag

I'm still kind of on a stamping kick where my crafting is concerned, so I created this Simple Ditty Bag using a recent stamp purchase to share with you.

Primitive Simple Ditty Bag

The Willow Tree is part of a stamp set that I got on Blitsy recently. I think the text sentiment came with that too, if I recall correctly. I grungy'd up the Muslin Bag first, of course, then I stamped it. Simple, cute, and prim. My favorite combination.

07 July 2014

Twinkle Twinkle Primitive Card

After finding some great Primitive Rubber Stamps, which I blogged to you about last month, I finally got a chance to get back into my studio and put some of them to use. Although I used stamps that I found a few days after my other stamp purchase when I did this project. This was my first creation with some of the new stamps. It's a grungy Kraft card, which I turned into some Altered Art, primitive style.

Twinkle Twinkle Mason Jar Primitive Card

I created this using three different clear acrylic stamps. The Mason Jar is one, the Stars are another, and the text sentiment is the other. The Mason Jar stamp is small (this is a 4x6 card) and is by Dear Izzy. I don't remember where I purchased that one, but it comes with a few even smaller stamps that have text and so forth. The Stars and the text sentiment came together I got them from the Unity Stamp Company.

I stamped the stars first, then stamped the Mason Jar, and then the text. And to add the yellow to the stars I used a little watered down Tim Holtz Distress Paint. The grungy edges were created with a Walnut Stain Distress Ink, also by Tim Holtz. I decided it would be neat to use the stars to create a matching envelope as well. More stamped projects to come soon!

09 June 2014

Primitive Rubber Stamps

I love great Primitive Finds, especially when they can help me do some more crafting! So I was thrilled last night when I saw these rubber stamps over on Blitsy. And I wanted to share my find with you.

Unity Primitive Rubber Stamps

The cow isn't so much primitive-looking, but I absolutely LOVE the sheep and the tree, and the house is cute too. So I know I'll have fun using these when they arrive. So stay tuned for that! In the meantime, if you want to get some of these stamps for yourself, hop on over via the link below.


And you better hurry. Items that are for sale on Blitsy are only there for a limited time, so if you want things from that site you have to buy them right away!

Happy Stamping!

02 June 2014

Raggedy Sheep Primitive Bag Topper

Since I didn't even make it into my studio over the weekend I decided to add to our collection of Primitive Freebies for you to download. So this is what I created for you.

Raggedy Sheep Primitive Bag Topper

Just click on the bag topper image above and that will take you to my DropBox download page for the image. It's in PDF format. The download link should be at the top right of your browser window.

Hope you like it! :)

27 May 2014

Americana Hang Tags

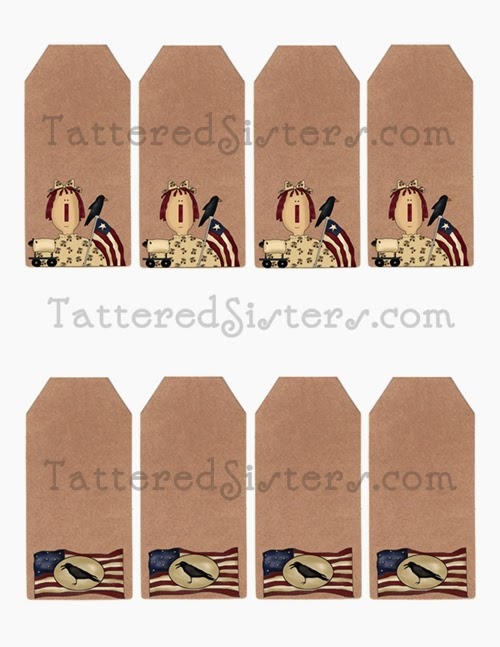
Since I haven't been crafting as much lately (because I'm focusing more on painting right now), I thought I'd create a new Primitive Freebie for you to download today. So I've created a PDF printable sheet of Primitive Hangtags in two styles for you. These are Americana Hang Tags.

Americana Hang Tags Primitive Freebies
All you have to do is click on the image above and that will take you to my Dropbox download page for this file. You can save it from there. Look for the Download icon at the top right side of your browser window. It will look similar to this:

Download Icon


Hope this helps you do some fun summer crafting!

Enjoy. :)

19 May 2014

Roosterific

I just wanted to share this fun gift I got for Mother's Day from my daughter. It's not necessarily prim, but it does have a wonderful vintage look that I love. And since we'll be moving in the next couple of years to "the farm" (as the Hubs calls it), I think he will live nicely in my farmhouse kitchen I will have there.

Vintage Rooster

And he's really the best kind of rooster...he won't make any noise! LOL.

12 May 2014

Primitive Teddy Bear

I've had this little stuffed bear sitting in my studio for years, because I was never sure what I wanted to do with him. I just always thought he was cute--even though I'm not really a teddy bear kind of gal. But I decided to do a little bit of primming with him and this is what I have...so far.

Primitive Teddy Bear with Pip Berries

I added some homespun to him, along with some Pip Berries, a couple of cinnamon sticks, and a Rusty Tin star. And I like that. But he doesn't look finished to me yet. I think I need to go back and grungy him up a bit. That may be the finishing touch that he needs to be perfectly primitive. Don't you think?

05 May 2014

Grungy Taper Bucket

I know I've been a bit lax in posting lately. It's just that I've been much more in art mode than in craft mode lately. Between working on art projects, art journals, and adding stuff to two online shoppes (not selling prims though)--not to mention blogging on several blogs and posting on several FB pages, it is very difficult to find time to do it all. So it seems I get a bit hyperfocused on a few things at times and can't always seem to find time for the other stuff. It's really just how my brain works is all. But I'm still here and I do have something to share with you today!

This is my Grungy Taper Bucket. I took one of my grungy primitive candles and added it to a mini Rusty Tin bucket, added a few little extras, and voila--my candle in a bucket.

Grungy Goods Primitive Candle in Rusty Tin Bucket

Now I will say that this is meant to be decorative rather than functional. I just think it would look cute sitting on a shelf or a table with some pip berries nearby, like I added in the photo. Just something simple and cute, and easy to make. It would be great as a gift too.

Oh, and just in case you need a reminder on how to make my Grungy Primitive Tapers, just click on that link and it'll take you right to the page.

07 April 2014

Rusty Tin Loaf Pan Mini

You know, sometimes when you want to give a Primitive Gift, but you aren't sure how to wrap it, it just takes a little scrounging to find the answer. Case in point, Primitive Melts. I had some melts and I wanted to give them as a gift. But how to wrap them? They are small and cute, but not very appealing just all by themselves. So I started scrounging through my stash o'goodies in my studio and found a mini Rusty Tin loaf pan. Perfection!

Rusty Tin Loaf Pan Gift
I just put my melts inside the loaf pan, and then wrapped some homespun around it. then I put it all in a clear cello bag and added some more homespun. I'm sure I've had these rusty tin pans sitting around for quite some time. I don't tend to throw goodies like that away--you never know when you might need them. So I'm glad I had them! Nothing says 'Primitive' like rusty tin and homespun! :)

02 April 2014

Robin Eggs Wax Melts

It's April so it's time to think Spring, y'all! And what could be more Spring-like that Robin Eggs?!

Robin Eggs Primitive Wax Melts

I had these Primitive Wax Melts tucked away in my stash of melts, so I bagged them up and I'm thinking I'll send them as a RAK to a friend. What could be a better gift for the start of Spring. :) But just in case you're wondering, no, I didn't make these. I can't even remember where I bought them truth be told. But I love them just the same.

31 March 2014

Doodle Bunny Pattern

Since I have been so focused on painting and art journaling lately, I haven't really done very much primitive crafting. But I don't want you all to think I've forgotten about you! So for this last day of March I thought I'd create a quick little Primitive Pattern for you. It's a Doodle Bunny. Just a little doodle that would be perfect for some bowl fillers, or shelf sitters, or even as some ornies.

Just click on the image below and that will take you to the PDF download of my Doodle Bunny.


I hope you like it. I'm still pretty focused on doing my art in my studio, but I will try to find some goodies to share with you in April. Hope you have a Happy Easter!

10 March 2014

Speckled Eggs

I decided to have a little spatter and speckle fun in my studio yesterday. I had some egg-shaped gourds in a basket in my kitchen, so I thought it would be neat to get out my Grungy Sauce and make some Speckled Eggs!

Primitive Easter Speckled Eggs

 I just dipped an old toothbrush into my ever-ready Grungy Sauce and then pulled the bristles back to make the sauce spatter all over the "eggs." Then when they were dry I filled a rusty tin bucket with some Spanish moss and topped it off with the "eggs." A perfect little Primitive Easter table decoration.

03 March 2014

Canned Pears Primitive Wax Melts

You know, every time I start to do some digging or re-organizing in my house and/or studio, I always come across something that I've tucked away and forgotten about. Case in point: these Primitive Wax Melts that are pear-shaped and smell like creamy vanilla and pears.

Canned Pears Primitive Wax Melts

My, but do they smell heavenly! They have a light dusting of cinnamon on them too. And they're all tucked in a Mason Jar with rusty tin lid too. So cute. These are a leftover from when I used to sell prims, so they've been sitting here for awhile. But being in the jar must have helped because they still smell so good! This is a great way to give wax melts as a gift, that's why I loved selling them this way. :)

24 February 2014

Bird and Pip Berries Basket

I was out in the studio over the weekend, mostly working on new art journal pages and a new mixed media painting. But I also squeezed in a little time to create this Bird and Pip Berries Basket to share with you.

Bird and Pip Berries Basket

Even though it's still super cold here in Ohio, I'm trying to think of birds singing and the arrival of spring (eventually!) as much as possible. So this was my attempt to ignore the winter chill. The Pip Berries are two shades of a yellow, along with a pastel green. And I thought the bird looked cute perched in there. :)

17 February 2014

Shabby Prim Fabric Hang Tag

I've been so focused on doing my art and art journaling lately that I haven't done a lot of crafting. I'm sorry for that. But sometimes I just have to switch gears and follow what my creative spirit is telling me to do. I do want to share something with you today, so I hope you'll like this Shabby Prim Fabric Hang Tag.

Shabby Prim Fabric Hang Tag

I really don't sew often. I don't enjoy it much. ;) But every once in awhile I don't mind doing it, especially when it's something small like this. It's different, and definitely a little bit shabby and a little bit primitive.

10 February 2014

Valentine Hang Tag Freebies

OK, so these are not really all that primitive-looking. But I was in the mood to create some Primitive Freebies for you, and when I got going, these two hangtags were the result.

Love Always Primitive Hangtag

Winged Heart Primitive Hangtag

These images are both a fairly good size, so be sure to click on each image to view it full size, and then you can download it from there. And even though they aren't necessarily prim, I hope you can use them with some gifts you might be giving for Valentine's Day.

And by the way, I've been in art mode lately, not crafting a lot. I've been working in my art journals a lot instead, which is why I haven't got any new crafts to show you. I just get tunnel vision sometimes in my studio. Can't help myself. :) If you're ever curious about my art, whether it's my journal pages, or digital art, or painting or what not, I hope you'll stop by my other blog:


Hope you all have a wonderful Valentine's Day!

31 January 2014

Primitive Grungy Chocolate Easter Bunny

I was poking around in my office the other day, which also is a hiding place for some of my primitive goodies, and I came across some plain Chocolate Easter Bunny wax melts that I had tucked away. They really did look like chocolate too. Well I decided to hand rub them with some cinnamon, because that's just how I roll.

Primitive Grungy Chocolate Easter Bunny Melts

You know how much I love Grungy Goods, so why not grungy up some "chocolate bunnies?" I think they look super cute. I doubt the cinnamon will stay on there forever, but I was just doing it for fun anyway. They still smell chocolatey too. :) I'm not gonna melt them. I'm just gonna put them out for Easter because they'd look cute sitting in a basket, don't you think? Amazing what I can find in this office of mine!

24 January 2014

Spring Eggs Hang Tags Freebie

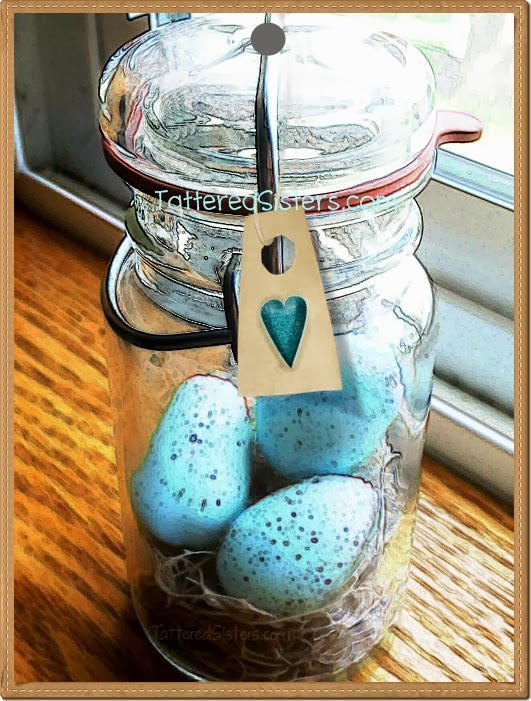
I don't know about you all, but in my neck o' the woods it's been downright C-O-L-D! And all I can think is, hurry up, Spring! So with that in mind, I've created these Primitive Spring Eggs Hang Tags.

Primitive Spring Eggs Hang Tags

For your download, which is in PDF format, you will get 4 of these hang tags on the sheet. There is a small watermark on the nest part of the tag in the printable version--but the blue watermark near the top of the jar is not on the printable. Just click on the image and that will take you to the download page. You may use these tags on your personal and/or commercial products--BUT, you may not sell these tags or claim them as your own. You also may NOT download the above digital image and use it--the image in the post is for preview purposes only. You may only use the printed version of these tags. Let me know if you have any questions on that.

And lets hope that Spring will be on its way soon. I've had just about enough snow and cold this winter to last me for quite awhile. But seeing that it's not even February yet, something tells me that Old Man Winter isn't done with us yet. Stay warm, folks!

20 January 2014

Primitive Sheep with Hearts

I had these two plain, resin Primitive Sheep sitting around and I wanted to do something with them to make them more interesting, and that could also tie into Valentine's Day. So I did some thinking and...

Primitive Sheep with Hearts

I decided that Mod Podge was the answer! I printed out some Primitive Hearts onto paper and cut them out, and then just Mod Podged them onto the primitive sheep. Voila! Instant Valentine's Day decor! Love my little sheep. :)
18 January 2014

Craft Pricing Worksheet for Handmades

I came across a blog post recently on the Aeolidia blog that has some very helpful information on how to price handmade goods for Wholesale and Retail. It's a whole post about Wholesale Pricing Tips and Formulas. Since I have a lot of followers who make primitive handmades to sell, I thought I'd share that link with you because I think you'll find it quite helpful.

I also wanted to share a downloadable worksheet freebie that I created when I had a business blog. I don't have that blog anymore, but I thought the worksheet is still a good tool for calculating prices for handmades. And seeing that Aeolidia blog post just made me want to share the worksheet here as well. 

Craft Pricing Worksheet Download

Just click on the preview image above and that will take you to the downloadable document, which is in PDF format. It's yours to download free, and I hope it will be helpful to you.

Just remember, there are lots of ways to compute prices for your handmades. If you don't like one, you can do a little Googling and find others that may work better for you. And be sure to check out the Aeolidia site a bit more as well, because they have other articles that may be helpful to you. They have another article called Wholesaling Handmade Items, and others that are full of great information.

13 January 2014

Grungy Valentine Treat Bags

With Valentine's Day fast approaching, I guess it's only appropriate to create some heart-themed goodies. So I've created these primitive Grungy Valentine Treat Bags to share with you.

Primitive Grungy Valentine Treat Bags

To make these Grungy Goods, you'll need some grungy'd up muslin bags, and you'll need some primitive graphics printed onto iron-on transfer paper. Just as a reminder, you can make your own Grungy Sauce using my Grungy Sauce Recipe. Create any designs/word combinations you'd like and print it onto your iron-on transfer paper. Be sure that if you use words you use the option to reverse the text when you print--otherwise your text will print backwards! I chose a cute prim gal holding some hearts, and also a primitive sheep with a heart on my bags.

Easy, peasy to make and great for gift-giving this Valentine's Day!

08 January 2014

Valentine Mason Jar Bowl Fillers

My head is sort of leaping ahead to Valentine's Day. I have some heart-themed goodies to share soon, but I wanted to share something also that doesn't involve hearts, but could still be a great Valentine's Day gift anyway.

You know I love Mason Jars, and I love coming up with new ways to create Primitive Gifts with them. So this time I've created some Valentine's Day Mason Jar Bowl Fillers. And while there are no hearts in this jar, the colors of the items inside are perfect for Valentine's Day.

Valentine's Mason Jar Bowl Fillers

There are three layers of primitive bowl fillers in this jar. The first layer, on the bottom, is bleached cedar roses. I love these because they are so rustic looking--but also very pretty. Then the next layer has some burgundy-red colored, grungy-looking balls. I happened to have some in my studio and I loved the color so I poured some in. Then I added some 1" cinnamon sticks for a nice, warm color on top. I topped the jar with a rusty tin lid, added a homespun tie, and added a longer cinnamon stick on the jar for a final touch.

This is all ready for gift-giving, and all the recipient has to do is pour them in a bowl and enjoy them! The cinnamon sticks will give a nice little natural scent too, which is an added bonus. I didn't add any fragrance oil because of of the burgundy balls; the oil would likely either eat away the color or make them run, and that wouldn't be any fun. But these aren't really meant to be scented anyway--they are pretty just as they are, don't you think?

You can make so many gifts with Mason Jars--just layer in your favorite bowl fillers, or even vintage items (buttons, lace, spools, keys) and do them up with a heart-shaped tag or something, and there is just no end to the ways you could make a gift for someone.

07 January 2014

Primitive Rusting Recipe

Sorry that I've been kind of absent of late. The holidays tend to take my attention to family, so I was not as active with my blogging as I normally am. I thought I'd start the new year though with a Primitive Recipe for rusting metal.

There are lots of recipes to rust metal. Some involve the use of bleach, which I prefer not to use. So the recipe I like uses simple ingredients you usually have on hand, and that aren't going to be too nasty to use. It will still smell gross, but it's a lot safer than using bleach. Although I still wear rubber gloves when I use this, just to be safe. I urge you to wear rubber gloves as well.

It's also important to note that not all metals will rust at the same rate. Iron rusts the best--but how often would we have iron items we need to rust? Just know that if you're rusting various items, they won't all look the same amount of rusty when this process is complete.

Ingredients
  • 1 16oz Bottle of Peroxide
  • 1 Cup Distilled White Vinegar
  • 1 TBSP Kosher Salt (iodized "table" salt just doesn't work right)
  • Items for rusting (safety pins, bells, nails, etc)
  • 2 Plastic Containers for the mixture--one container should have a lid
  • Old cookie sheet you won't use again (or a piece of cardboard) lined with paper towels
  • Plastic Spoon (not metal!)
  • Rubber Gloves
Directions

1. If you're using a plastic container like I do to do your mixing, poke holes in the lid. Your other container doesn't need a lid, but one of them does because it will serve as a strainer later on.

2. Add your Peroxide, Vinegar, and Salt to your container and stir. The vinegar and salt are going to be doing the rusting, by the way; the peroxide adds oxygen, which helps to speed up the oxidation process.

3. Add your metal items and stir again, then cover with the lid. Then set your container somewhere, away from pets and humans. It's going to smell, and you don't want pets or kids getting into it. It's good for it to get some direct sunlight, if possible. Leave the container set for a day. Stir your solution a few times during the day.

4. Put on your gloves again and then strain your metal items by pouring the liquid out thru the plastic lid of your container into your second plastic container. Once empty, spread your metal items onto your cookie sheet so they are in a single layer.

5. Let the metal items dry for a few hours, then turn them over to make sure they dry completely on both sides. Drying in the sun is very helpful--but do NOT put these in the oven. You don't want fumes from items to get in your metal oven. The items should get more rusty-looking as they dry.

6. Remember that not all items will rust at the same rate, nor will they all look the same. If you're unhappy with the finish you can repeat the rusting process. 

Here's an example of a variety of safety pins that I rusted:

Primitive Rusting Recipe

Now, what do you do with your leftover rusting solution? That's a good question. I've researched this a lot, on a variety of websites--from chemistry boards, to artist sites, to hobbyist-related and all sorts of sites in between. And the options I have found are varied.
  1. Dilute the solution with a large amount of water and pour down the toilet. I have done this in the past, and since my husband is a plumber, he said it was fine since the solution has been so diluted, and because we do not have any copper/metal pipes. If you're not 100% sure about your pipes, I would avoid this option.
  2. Pour into the solution a large amount of kitty litter. Once the liquid is absorbed, put it into a zip-lock bag and put in your trash.
  3. Pour into the solution enough Baking Soda to absorb the liquid; this will serve to neutralize the solution and solidify it so you can then put it in a zip-lock bag and throw it away.
  4. Seal the solution into a small container or jar and throw it away. 
Which disposal method you use is really up to you. I think you should use your best judgement or do some more research on your own. I personally also do not re-use my rusting solution. I feel that after the products are combined and their chemical reaction occurs, the solution isn't quite the same anymore. So I just do a lot of rusting at one time, and make new solution each time.

I also found another method of rusting using the same ingredients. So I'm gonna share that here. I haven't tried it, but at least it gives you another option.
  • With a spray bottle, spray items with white vinegar and allow to dry. Repeat on other sides.
  • Mix - 16oz hydrogen peroxide, 2oz white vinegar, and 1/2 Tbsp of salt in a spray bottle
  • Spray and watch the rust appear, allow to dry and then repeat for desired effect
If any of you try that particular method, please email me and let me know how it went. I think that would be great for doing a small number of items at a time. Happy rusting, everyone!

UPDATE: One of our readers (Marcia) wrote in to share some tips for rusting items that she uses with great success. Marcia suggests that you soak things in toilet bowl cleaner first, before rusting them. She says it takes the zinc coating off the items and they then rust a lot better. She also says she uses the cheapy The Works brand, lets the items soak for a few minutes, then rinses them off and dries them before putting them in the rusting solution. Marcia also uses an old toaster oven in the garage to bake her rusting items in for about 15 minutes. Thanks for your great tips, Marcia!