09 December 2013

Candle Pan Snowman Ornie

I thought I'd share another Primitive Ornie with you that I made recently. It's another Primitive Snowman, but this time I made it out of a tin candle pan.

Primitive Candle Pan Snowman Ornie

I took a tin candle pan that was already white, and the first thing I did was add some brown ink to the edges of the pan to distress it a bit. Then I used regular craft acrylic paint to paint on my snowman face. And then I added the "Let It Snow" sentiment to finish it off. I can punch a hole in this using my Cropodile to make it easy to hang on the tree. This was a fun and easy ornie to make and I love how it turned out. :)

02 December 2013

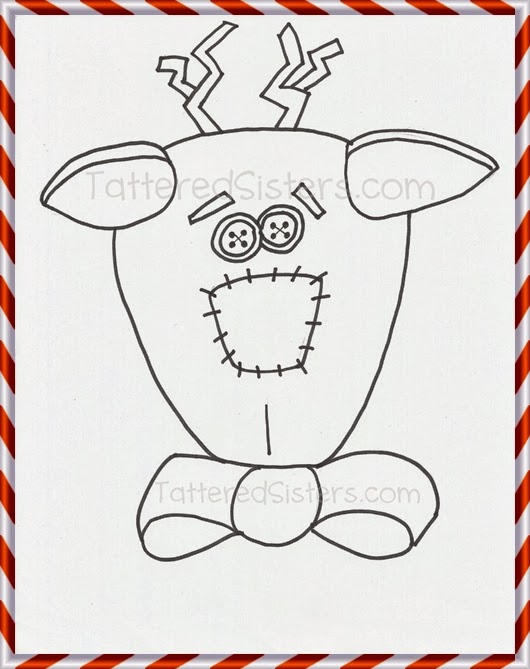
Reindeer Doodle Freebie Pattern

Since I was too busy cooking and what not for Thanksgiving last week to get into the studio, I thought I'd at least do a little drawing and see if I couldn't get a Primitive Freebie made up to kick of the holiday season. So I made this Primitive Reindeer Doodle freebie for you to download.

Reindeer Doodle Freebie Pattern

Just click on the image above and that will take you to the download page, where you can download this Primitive Freebie in PDF format. I hope that helps to get you in the Christmas spirit...or at least in the crafting spirit. :)

25 November 2013

Grungy Sauce Recipe

Hey, gang. I'm re-posting my Grungy Sauce Recipe because for some reason, people have trouble finding it on the blog. Even though it's in the Primitive Recipes category, some folks can't seem to find it. I think it's because it is posted in my Grungy Hang Tag Tutorial. So I want to make it easier to find and just post that recipe all by itself. Not sure why I didn't do this a long time ago! :)

Grungy Sauce Mix Ingredients:
  • Instant Coffee (get the cheapest you can find...I always buy generic)
  • Vanilla or Imitation Vanilla Extract (again, go cheap if you want to; I use good vanilla for baking so I always have some on hand. But if you're not a baker just get cheap imitation vanilla!)
  • 2 Cups Hot Water (I just nuke it so it's hot enough to dissolve the coffee, but not hot enough to burn my fingers while I'm working.)
  • Ground Spices (this is totally optional and I only use it occasionally; I mostly use cinnamon)
  • A Bowl
  • A regular spoon or teaspoon
 
Grungy Sauce Mix Recipe

Mix up your grungy sauce. Take the 2 cups of hot water and to that the instant coffee--twice as much as the directions tell you to. Mine says 1 TSP for each 8 oz cup, so I use 2 TSP for each cup. You want the grungy sauce good and dark, so really, you can add as much as you want--so add more if you want to! Also add 1 TSP of vanilla, and your ground spices, if you're using them. Just a little sprinkling of spices will do.

Once it is mixed up, you can use it right away, or you can let it cool off first. If you're going to be dipping things into it, I'd suggest letting it cool first so you don't burn your fingers! I store my sauce in an old jar in the refrigerator. Occasionally, I also put some in a spray bottle and keep that in the frig too. The spray bottle is great for when you just want to spritz some grungy sauce onto a finished project; whereas the sauce you have in a jar you can pour into a bowl and use for dipping things, like hang tags or what not.

There are many variations to this recipe out there. Some people use tea instead of coffee. I think I tried that a few times, but I prefer the instant coffee because it's just easier. You can't really screw this up, so don't worry in that regard. Have fun with it.

Now go forth and get grungy!

20 November 2013

Rusty Tin Star Christmas Ornie

Since I was still in Primitive Christmas mode in my studio over the weekend, I made a few ornaments. This is the second of three that I made while the creative juices were flowing. It's my Rusty Tin Star Christmas Ornie.

Rusty Tin Star Primitive Ornie

I took a 3" long Rusty Tin star and painted it with a pale blue acrylic paint. Then I distressed the edges a bit with some brown ink, and I also light sanded with sandpaper to remove just a bit of the surface color. Next I took my Crop-a-Dile and punched a small hole at the top and bottom of the star. Then I fashioned a curly shape from some rusty tin wire, hung a rusty bell on the end, and attached that thru the hole at the bottom of the star. Finally, I took some more wire and fashioned a rusty ornie hook and attached it to the top of the star.

And voila! A new Christmas ornie. Simple, and prim. :)

18 November 2013

Primitive Snowman Face Ornie

Well, I managed to make a few different primitive ornies while I was in the studio over the weekend. So I'll be sharing them with you over the next week or two. This first one is made of a small wooden rectangle shape with rounded corners. I thought it would be perfect to turn into a Primitive Snowman face.

Primitive Snowman Wooden Ornie

First I painted the wood shape white, and then I added the facial features. Next I grungy'd up the edges with a little bit of brown stamping ink so it would look a bit aged and distressed. Then I made the hat using the top part of a baby sock. (I always have some cheap baby socks on hand in my studio for crafting purposes.) I cut off the foot part of the sock and used a strip cut from that to tie around the top of the hat. That way it is gathered up at the top. Then I used scissors to cut strips in the top part of the hat so they would curl over. Finally, I added a Rusty Tin bell to the hat with a rusty safety pin.

15 November 2013

Primitive Christmas Tree Mini

When I was in the studio last weekend I wanted to make something a little Christmasy, so I decided on this Primitive Christmas Tree. It's mini-sized, perfect to add to some tabletop decor or to a little shelf somewhere.

Primitive Christmas Tree Mini

I used a Rusty Tin bucket for the base and put some Styrofoam in the bottom. The tree itself started with a long cinnamon stick that I tied some homespun ribbon to. Then I added some green Pip Berries and rusty tin bells--and added a cute prim star to the top. Then I just stuck it in the foam in the bucket and added some Spanish moss over that.

You could always omit the bucket and just use the mini tree as an ornament for your Primitive Christmas tree as well. Super easy to make.

11 November 2013

Primitive Harvest Pumpkin Magnet

Well, I finally made it back into my studio over the weekend. It felt good to get back in there. :) I wanted to make something for Fall but I wasn't sure what to make. Something led me to some blank wood shapes I had sitting around, so I decided to create this Primitive Harvest Pumpkin Magnet.

Primitive Fall Pumpkin

I painted it an orange color first and then grungy'd up the edges of the wood with some distress ink. Then I stamped on the pumpkin and the word, Harvest. Then I added some leaf rub-ons that I happened to have tucked away. I added a few paint highlights to the pumpkin too, though you can't really see them in this photo. And I added a magnet on the back so I can hang it on my refrigerator. :) It was just a simple little Primitive Fall magnet, but it was fun to make.

05 November 2013

With a Chick Chick Here

I'm not sure I've ever shared these before, and it may seem silly...but I have a few little chickens in my kitchen and I love them. 

Chickens Primitive Home Decor

Let me start by saying that no, I don't have a thing for chickens. :) I just noticed one day that I had several little chicken items, so I grouped them all together on a shelf in my kitchen. And that is now the kitchen chicken shelf! 

I have a clear glass chicken dish (left) that used to belong to my great grandmother, so that's a fun bit of Vintage Goods and a nice part of my family history too. Then there are several little chicken knick knacks in there, four or five, I believe, and also a chicken tin (back right). There are other little what-nots on that shelf too, but it is mostly the chickens. Seems fairly appropriate that the little chickens should reside in the kitchen. 

I love antique items, prims, and vintage goods in my home. I especially love them in the kitchen, so we have a lot in there. When we get to move out to our farm property in the next few years, I imagine we'll have even more. And if the Hubs has his way, we'll probably have some real chickens too. Lord, help me. ;)

04 November 2013

Fall Pumpkins Tags Freebies

I haven't been crafting as much lately--just can't seem to get motivated for some reason. But I didn't want you to think I'd abandoned you all together! So I created something to add to my collection of Primitive Freebies here on the blog. So here are some Fall Pumpkin Tags that I've made for you. This is what they look like.

Fall Pumpkins Tags Freebies

These could be used as gift tags, bag toppers, or even as place cards for your Thanksgiving table. The free download has 6 of these on one full sized sheet, in PDF format. No watermark appears on the downloadable tags. Just click on the text link below and you'll be taken directly to the download.


As always, please remember that these tags are for your personal, non-commercial use. They are not to be listed for sale (anywhere), nor claimed as your own.

08 October 2013

Prim Sheep Doodle Pattern

I didn't get any crafting done over the weekend, but I wanted to share something this week, so I created this Prim Sheep Doodle pattern and turned it into a PDF as a Primitive Freebie.

Prim Sheep Doodle Pattern

Just click on the text link (below) and that will take you to the PDF of the pattern that you can download. I think it would make a cute stitchery or something.

CLICK HERE FOR THE PRIM SHEEP DOODLE PATTERN

The Primitive Pattern is mostly hand drawn, but I had to neaten up the eyes digitally because they didn't turn out too well after the scan. Hope you can use it for something fun!

01 October 2013

Prim Fixins Tutorial

I don't think I've ever done a Primitive Tutorial on how to make Prim Fixins. I supposed that's because they are so easy to make that I just figured a tutorial wasn't really necessary. But then I started thinking about it today and I thought maybe I should do one. The holidays will soon be upon us, after all, and Prim Fixins make a perfect gift! So I hope this will help any of you who aren't really sure how to go about scenting your rosehips, cinnamon sticks and such. This will just be for a 2-cup amount of fixins, but once you read the instructions you'll see you can adjust it and use for any quantity you might be making. And please note: all of the supplies I use can be purchased from the suppliers listed on  my Primitive Crafting Supplies page.

Primitive Fixins Tutorial

Supplies Needed
  • 2 Cups of Rosehips
  • 1/2 Ounce--or less (give or take) of Fragrance Oil of your choice.
  • A Glass Jar with lid
  • A Spoon for stirring
  • A cello bag or glass jar for your scented rosehips to go in when you're done
Instructions
  1. Add your rosehips to your jar. I always use glass because the fragrance oil can ruin many types of plastic, and I use a big jar so they have room for shaking (in step 3).
  2. Drizzle in your fragrance oil s-l-o-w-l-y, stirring as you do so. You only need just enough oil to *just* coat the rosehips. You have to know that rosehips are NOT really porous at all. They will not absorb the oil much at all during this stage. It takes time really, so if you add too much oil you're just going to have slimy, wet rosehips for a very long time, and that's not ideal. So just drizzle a little oil in and stir. If they look just barely wet that is *all* you need. Trust me.
  3. Now I tend to let my rosehips "cure" for a week or two in the glass jar with a lid. I shake them once a day to make sure all the rosehips are taking the scent. The hips may dry quite a bit during that time, or maybe not so much (depends on lots of things, and that's another reason to go easy on the oil). If you don't want to "cure" your hips, you can "bake" them in the sun for a day or two. I've never put mine in the oven (fragrance oil is usually flammable, and I don't want the scent to sort of stick around in my oven), so I don't recommend that. But I know gals who sun-bake theirs on cookie sheets (cover them with foil first!).
  4. Once your rosehips are done curing you can package them up. I add some cinnamon sticks to them and mix them up, then put them in a cello bag or glass jar.
That's pretty much it! I will add too that I have many times skipped the curing when I'm in a pinch for a quick gift to give. So I'll scent some hips and put them in a jar for gift-giving the same day. But no matter if they're cured or not, I always include a note with my fixins to let folks know that the fragrance oil is not intended for painted, plastic, or finished wood surfaces, as it can ruin the finish. Glass or glazed ceramic/stoneware is always best. Better safe than sorry, as they say.

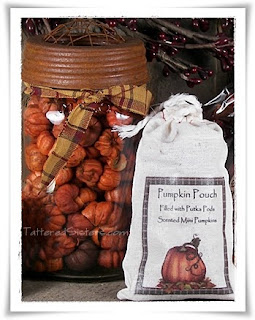
And finally, in case you're wondering, if you want to scent Putka Pods (mini pumpkin-like pods), you can use this same process. The only differences really are that 1) Putkas are VERY porous and they absorb the fragrance oil quickly; and 2) Curing isn't really as necessary since putkas are so porous from the get-go. I just let mine sit for one day and then they're pretty well good to go. And of course putkas are perfect for the Fall. I've used a Pumpkin Cheesecake scent in the past that was just heavenly. :)

24 September 2013

Pumpkin Muslin Bag

I was playing with some Muslin Bags in the studio the other day and decided I'd create this Pumpkin Muslin Bag for Halloween. If you remember my Grungy Boo Bags, I had fun creating those and wanted to create something different this year that could be used for treats. So that's how I came up with these.

Primitive Fall Pumpkin Muslin Bags

As always, I used a pre-made muslin bag for this. Then I knew I wanted the bag to look orange, but also sort of Grungy at the same time. So I looked through my various bottles of sprays and found a copper spray, made by Tattered Angels. I tested it on some scrap muslin first and it looked perfectly orange, so I went ahead and sprayed my whole bag. But I didn't spray it enough to make it solid orange--because I wanted it to look grungy too. Once that dried I drew on a jack-o-lantern face with pencil, and then just painted it with black craft paint. That's really all there was to it!

These would be great for treats, but also just for decor on a shelf or something. Very quick and easy to make.

18 September 2013

Mini Faux Caramel Apple

Well, it's that time of year again. You know, Primitive Fall. :) Leaves are starting to fall, mornings are cool, and sweater weather will soon be upon us. And all I can say is yay! I love Fall. And it's already inspiring lots of things I'm seeing on Pinterest and on other blogs.

One thing I've been seeing for the last year or two is faux caramel apples. I've been wanting to make one, but I was hunting all over for my plastic apples I had and couldn't find them. Very frustrating! All I could find was my mini plastic apples--the small ones I just use for little craft projects. But hey, I'm nothing if not improvisational. So I gave it a shot, and this Mini Faux Caramel Apple was the result.

Primitive Mini Faux Caramle Apple

OK, it's not perfect. I couldn't even find my crushed corn cob so that I could make it look like it has faux nuts on top. Urgh! I swear there are some fairies playing in my studio and moving my stuff! But anyhoots, it was an experiment, and at some point I'll be able to try it on some bigger apples. All I did was mix white glue with some caramel-colored acrylic craft paint. I drizzled it over the apple while it was setting on some wax paper, and then I let it dry. If I'd had the crushed corn cob I would have sprinkled some on while it was still wet. That would have made it much better (dang fairies!). Then I just grabbed a stick from outside and stuck it in my apple and added a homespun tie.

It's not too bad, right? Full sized ones would be so cute sitting around as Fall decor, or even as gifts, don't you think? If you do a Google Image search for "faux caramel apples" you will get some cool results to check out for inspiration.

16 September 2013

Grungy Ghost Pick

I was in a crafting mood over the weekend so I did several things in my studio yesterday. Some are for Tattered Sisters and some are for my art blog (Art Chick Studio). The first thing I made though was this Primitive Halloween Grungy Ghost pick.

Grungy Ghost Pick

I always have Muslin Bags on hand, because they are great for crafting, and for gifts and such. For this project, I had a muslin bag that was messed up (the result of a failed attempt at a previous project). It had some paint on part of it, but a good portion of the bag was still usable. So I cut off a corner section of the bag to make my ghost.

I got a little Styrofoam ball and wrapped the piece of the muslin bag over the ball, to form the head. I used the string tie from the bag to tie around the ghost's neck, securing it in place. Then I stuck a stick into the bottom of the Styrofoam ball so I could use the ghost as a pick. That would let me stick it anywhere I wanted to. I painted on the eyes and mouth with black acrylic paint, and then I distressed the fabric a bit with some brown (walnut stain color) Distress Ink. 

I happened to have a little rusty tin bucket close by, so I added some Spanish moss to it and stuck my grungy ghost in. Then I added a primitive crow just to keep him company. The ghost can be put anywhere--in some prim floral arrangement you already have or something else you might like. You don't even have to use a stick; leave it out and instead tie some thread through his head and hang your ghost somewhere.

This literally took me only minutes to make, and with materials I already had on hand. You could make a bunch of these and hang them or stick them all over for Halloween. Or you could even leave out the Styrofoam ball and use a sucker/lollipop instead to give as treats. You could easily do this with the kiddos too.

10 September 2013

The Kitchen Witch

Once upon a time, many years ago when I was little (around third grade, to be more precise), my mother told me a story about a Kitchen Witch. Her friend had received one as a gift and I didn't know what exactly a "kitchen witch" was, so my mother told me. The Kitchen Witch is a doll, often handmade, that is meant to be a good witch that keeps watch in the kitchen. It is meant to help ensure good food and safety, and to bring good luck.

So fast forward several months later and I was shopping for a birthday gift for my mom, when I just happened to spy, with my little kid eye, a Kitchen Witch in a store. Naturally, I had to buy it. I'm sure I was with my grandparents at the time, because they often took my sister and me shopping when my mom's birthday was near. The kitchen witch was an ugly looking thing, but hey, if she brought good luck I didn't care. So I got it and gave it to my mom and she loved it. She was surprised I'd remembered the story she told me about them. 

Fast forward again, to a not-so-enjoyable memory of my mother's passing last year. It was, of course, a very difficult time. A time of grief (that hasn't left me) and loss, but also of memories of times gone by. And one of the first things I thought of when I knew I'd be going to Texas for the funeral...was that kitchen witch.

Kitchen Witch Doll
Mom's kitchen witch was still hanging above the sink in her kitchen--precisely where it had hung in every single kitchen in every home she'd lived in since I gave it to her all those years ago. You can see that she's a bit worse for wear, a bit stained, and a bit...primitive-looking now (even though I gave her the most thorough cleaning that I could), as she hangs in my kitchen window, above the sink, just as Mom had her. And here she will hang, even when we eventually move to "the farm" we're planning to move into in the next few years...every day, until the day that I pass too.

Does she bring good luck? I don't know. But she does bring me the memory of a little girl, buying her mom a birthday present that she cherished until the day she died. And I just thought I'd share her with you today.

01 September 2013

Pip Berries Teardrop Spray

I was digging around in the lower part of my hutch the other day looking for something, and I happened upon a great find...something I'd forgotten was even there. It was a couple of these Pip Berries Teardrop Sprays.

Pip Berries Home Decor
It's funny how you get stuff sometimes, then stick it away to use later, and naturally forget that you ever bought it. What is it they say..."out of sight out of mind?" So true, even more so the older I get. LOL. But I was so glad to find these Pip Berries. I love them. They can hang on the wall just as they are, or I can add stuff to them to make them even more primitive. And I love the colors, don't you? Perfect for any time of year!

But please don't ask me where I got them, because honestly I don't recall. I'm sure they've been in my hutch for at least 4-5 years! So glad I found them though.

Mini Pumpkin Jack Dough Ornies

As soon as it's September, I start think about Fall, don't you? I look forward to the crisp, cool air, the changing colors of all the leaves, and the return of baking season! And what's more perfect for fall than Primitive Pumpkins? So here are some cute little Mini Pumpkin Jack Dough Ornies.

Primitive Pumpkins Dough Ornies

Throw these into a bowl of putka pods or scented rosehips, and you've got some cute decor for either Fall or Halloween. They are fairly small, only around 1" tall, so they are really cute and prim. As always, I use my Primitive Dough Recipe to make these. And I used in a silicone mold to make the pumpkins, in case you are wondering. I put the dough in, then pop them out and bake them on a cookie sheet. Easy peasy.

I bet you've got something fun cooking up for Fall too, don't you?!

05 August 2013

Pumpkin Apple Rusty Tin Bucket

Well it's August, so naturally I'm think about Fall. LOL. I can't help myself. I love Fall, so when back-to-school time gets closer I really start thinking about a Primitive Fall and Fall crafts, and cooler weather, of course. So while I was in my studio over the weekend working on some paintings and such, I decided to create this Pumpkin Apple Rusty Tin Bucket decor.

Pumpkin Apple Rusty Tin Bucket Home Decor

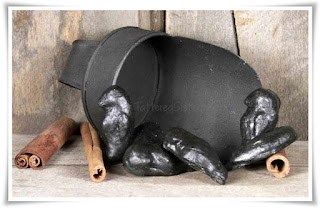
I took a Rusty Tin bucket and added a homespun tie to it. Then I filled with some pumpkin-scented putka pods (mini pumpkins). I stuck in some long cinnamon sticks here and there, and then I added just a few craft apples too.

This would make a nice centerpiece on a table. It would make a nice gift too.

15 July 2013

Hanging Mason Jar

I created this Hanging Mason Jar when I was in my studio yesterday. You just know I'm addicted to Mason Jars, don'tcha?!

Primitive Hanging Mason Jar

I just took a small Mason Jar and added a rusty tin frog lid to it. I also used some rusty wire and wrapped it around the neck of the bottle to create the hanger. Then I added a Rusty Tin heart and a little bit of homespun to the top of the hanger.

My thought was to use this for potpourri/scented Prim Fixins, which is why I used the frog lid on top instead of a regular jar lid. But this could also be used for votive candles, or battery operated tealights.

13 July 2013

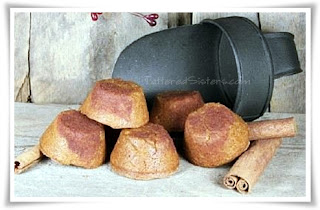
Mini Pantry Cakes

I thought I'd share some mini Pantry Cakes with you today. I just love all the things you can make with a Primitive Dough Recipe, so I use it a lot.

Primitive Mini Pantry Cakes


I used a non-stick mini muffin tin to make these, let them cool once they were baked through, and then popped them out. Since they have shortening in them, they don't tend to stick. But you could probably spray your muffin tin if you wanted to. 

These are great as Primitive Bowl Fillers, especially if they are mixed with other fixins or goodies.

08 July 2013

Primitive Pumpkins

What is it about July that makes me start thinking about Fall? That's kind of weird, don't you think? LOL. But for some reason, once mid-summer is here my head goes to Primitive Pumpkins and everything Autumn. So I just thought I'd share some Primitive Fall inspiration, in case you're like me and thinking about cooler weather and falling leaves--while the air conditioning is still on.

Primitive Pumpkins Putka Pods

Putka Pods are perfect for Fall because they look just like miniature pumpkins. I love them because they are so easy to add scent to, since they are much more porous than rosehips. They hold the scent really well and a little fragrance oil goes a really long way with these little guys. There are also lots of ways to package putka pods: in a jar, in little pouches with creative labels, in a clear cello bag, or how about a burlap bag with a pumpkin image stamped onto it--or maybe with a vintage pumpkin seed label? I think the ideas are pretty much endless.

So there's some pumpkin and fall inspiration for you. We now return you to your regularly scheduled summer. :)

01 July 2013

200th Post Primitive Giveaway

Hard to believe it, but this is my 200th post! So to celebrate this milestone and thank all of you for following me since the start of Tattered Sisters, I'm hosting a Primitive Giveaway!

200th Post Giveaway Tattered Sisters

The prize for this giveaway includes the following:
  • One jar of Summer Citrus Simmering Spices
  • One package of rustic ball bowl fillers
  • One set of grubby hanging candles
  • 2 Cinnamon Stick Bowl Fillers
  • 8 Mini Crow Dough Ornies
To enter this giveaway, all you have to do is add your first name and your email address to the form below. Please note: this is for contest entry and notification purposes only--I'm not signing you up for anything else when you enter the contest!

200th Post Giveaway at Tattered Sisters Primitives

There is a limit of one entry per person. One winner will be chosen at random and notified by email at the close of the contest period on July 15th. I will email you if you are the winner to get your shipping information. Good luck to each of you, and thank you so much for being a follower of Tattered Sisters Primitives!

25 June 2013

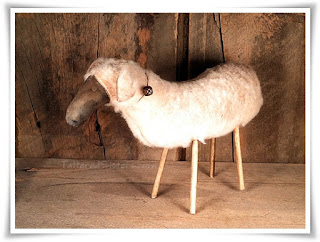
Primitive Sheep Find

The Hubs and I celebrated our 29th anniversary over the weekend, and as we were on our way to Fort Wayne for an early dinner, we decided to hit a few garage sales along the way. I didn't find a whole lot of treasures, but I did manage something cute to add to my collection of Primitive Finds. It's this adorable Primitive Sheep!

Primitive Sheep Find

Isn't it cute? It appears to be handmade, although I could be wrong about that. But it's still cute either way. I don't always find cute prims when I'm garage-saling, so when I do I snatch them up if I like them. Of course, I prefer the handmades. But a bargain is hard to pass up at a garage sale, even if it's not handmade!

18 June 2013

Prim Fixins as Gifts

I do a lot of stuff with Prim Fixins. You know, adding scent and different combinations of fixins for various things. I think it's so easy to forget though that not everything has to be scented. And sometimes, some simple, unscented Prim Fixins make really cute Primitive Gifts.

Here are some examples of some great Prim Fixins--totally unscented and natural, that would be perfect for gift-giving, and even as Primitive Bowl Fillers all by themselves.

Prim Fixins Cedar Roses Bleached
CEDAR ROSES, BLEACHED

Prim Fixins Cedar Roses Natural
CEDAR ROSES, NATURAL

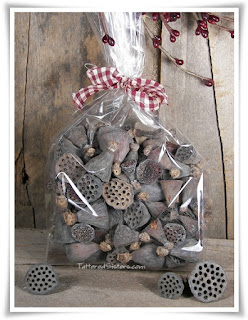
Prim Fixins Lotus Pods
LOTUS PODS
All you need is some of nature's beauty, found in things like Cedar Roses or Lotus Pods, or any other nice looking dried botanical. Fill up a clear cello bag, add a homespun tie, and you've got an instant gift. And of course you can mix and match all the botanical goodies for something really fun. :)

09 June 2013

Mini Crow Dough Ornies

I love Primitive Crows. And I also love things in mini sizes. So what better than to combine primitive crows and make them mini Dough Ornies?!

Mini Crow Dough Ornies

These are made with a silicone mold using my usual Primitive Dough Recipe, but with some powdered black tempera paint mixed in. That's a great way to make colored dough ornies, without having to paint them afterward. :)  Then I went ahead and sealed these in melted paraffin wax too.

08 June 2013

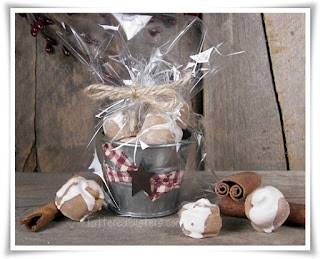
Bucket of Buns Wax Melts

I thought I'd share a cute idea that is perfect for Primitive Gifts. It's this cute little Bucket of Buns, full of cinnamon bun Primitive Wax Melts.

Cinnamon Buns Primitive Wax Melts

You just need a little mini bucket (I used galvanized, but you could use rusty tin too), some homespun for the tie, cinnamon bun wax melts, a tin star, a clear cello bag and some jute to tie the bag (though you could use homespun for that too). 

This is a great gift for anyone who likes wax melts, or even cinnamon buns. It smells heavenly when you open up that bag too.

03 June 2013

Summr Citrus Simmering Spices

I decided I wanted to make a simple, quick gift for a friend who loves my Simmering Spices. So I decided to make one just for summer, and one that is just super easy and quick to make. So these are my Summer Citrus Simmering Spices.

Summer Citrus Simmering Spices

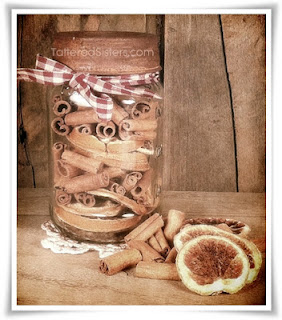
All I did was combine dried orange slices and cinnamon sticks to one of my Mason Jars. I mean, nothing says summer like oranges, and the cinnamon was just enough spice to make it a fun simmering scent. I topped it with a homespun tie and a rusty jar lid, and voila, ready for gift-giving!

You can make Simmering Spices with virtually any spice combination. Some lemon, obviously, would be perfect with this too. I didn't have any lemon, but I love the idea of orange and cinnamon, so I just went with it. :)

24 May 2013

Mason Jar Candles

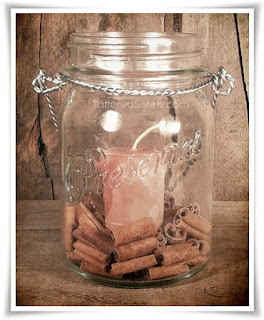
I was shopping at the local Menards store the other day and came across a great find. It was a box of 3 Mason Jars, a larger size, with a wire handle at the top. They were only $5 for the box of 3, which was just too good of a deal to pass up! So I bought a set.

Mason Jar Candles

I grabbed some cinnamon sticks and a votive candle to add to one of the jars. Isn't it cool? Now granted, I could have used any one of the many Mason Jars I already have in my studio to do this. But 3 jars, with handles, for $5? Come on. I had to! And these are bigger than regular Mason Jars, so it gave me more room at the top to get my hand in there.

I can use these outside on the patio, or hang them on the porch, or anywhere inside the house too, and I can even change out the cinnamon sticks for rosehips or putka pods, or you name it! Even some simple potpourri would look cute in there. That is what I call a great Primitive Find!

20 May 2013

Grungy Mini Rolling Pins

I thought I would share some more Grungy Goods this week, since you know how much I like to make things grungy! This time I've made mini Grungy Rolling Pins.

Grungy Rolling Pins

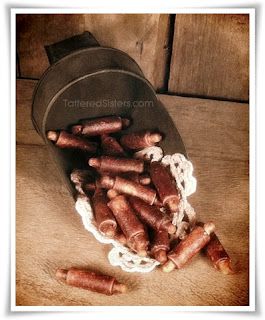
My motto is, 'you can grunge up almost anything,' so I love testing that out from time to time. These mini rolling pins can be quite the challenge to do since they are so small. But I just use some metal tongs to dip them into the melted wax and it seems to work pretty well for me. These are wooden rolling pins, and I think you can grunge up almost anything made of wood, and I have a lot of fun trying!

As always, these are great Primitive Bowl Fillers, alone or mixed in with your other Prim Fixins.

13 May 2013

Muslin Bags 5 Techniques

I wrote an article once on some different ways you can use Muslin Bags in your crafting. Since I use muslin bags a LOT in my primitive crafting, I thought I'd share the techniques here as well, in hopes it may spark some ideas for you.

Muslin Bags 5 Techniques


  1. Stenciling: After making this muslin bag into a Grungy Good I used a stencil to add the word, 'Fixins' to the bag.
  2. Sewing Embellishments: I created a fabric flower out of some fabric scraps, and then sewed it onto a grungy muslin bag, then added some buttons as well.
  3. Painting: Muslin is easy to paint on, so you can always add some acrylic paint to create characters, letters, images, or what-not to your bags.
  4. Spray Painting: I used brown textured spray paint on this bag, along with a paper doily used as a stencil. It gave a neat, aged leather look to the bag. This is on of my Shabby Prim creations.
  5. Rubber Stamping: I used three different rubber stamps on this bag, one was a text stamp, one was the butterfly, and one was the word, 'believe.' I also sewed on some ribbon trim and a fabric flower. Not quite prim, but you get the idea.
The way I see it, plain muslin bags are little blank canvases, begging to be embellished in some way. Use them plain, use the grungy, use them with paint or stamps, or notions--or whatever you can think of. You're only ever limited by your imagination. And they make perfect gift bags too!

29 April 2013

Primitive Paddle Box Lamp

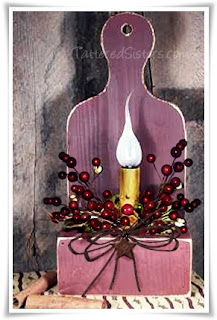
I don't really have a lot of Primitive Lighting in my home, but I do have this Primitive Paddle Box Lamp in my living room, sitting on the table by my couch. I really like it--but I didn't love it. It really didn't have enough color in it to suit me, so I decided to jazz it up a bit with more Pip Berries.

Primitive Paddle Box Lamp

Yep, that's just what it needed. :) OK, they probably aren't technically pip berries, but they are berries. And now I love it!

22 April 2013

Primitive Star Canvas

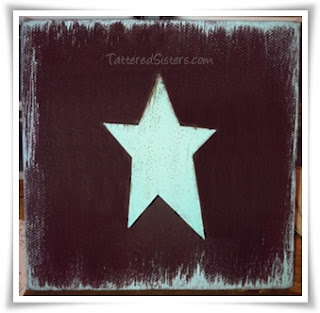
Over the weekend I created a deep red canvas in my studio that has a robin's egg glue distressed finish on it. I actually ended up using the canvas for another project too that I'll be posting on my Art Chick Studio blog, but this Primitive Star Canvas was the first thing I did with the canvas.

Primitive Tin Star Canvas

This is just a 5" square canvas that I painted with a deep, dark red color (which is fast becoming one of my favorite colors). It's "Napa Red" that I have darkened a bit too. Once it was dry I gave the edges a distressed look by dry brushing robin's egg blue along the edges. Then I took a Rusty Tin star and painted it the same blue, and then stuck it to the canvas to stick out in relief.

I think this is a really simply project for creating some cute Primitive Home Decor. Of course, you could use any colors you like (I'm just kind of loving the deep red and robin's egg blue combo right now), and put anything in the center that you like too. I just thought a star was perfectly prim and would add the right touch that I wanted.

15 April 2013

Primitive Crow Bird Bath Decor

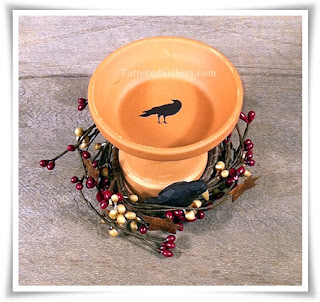
I was in the mood for some Primitive Crows while I was in the studio over the weekend, and I was also trying to find a creative way to use a mini Terra Cotta pot I had in my studio too. So what I came up with was this mini Primitive Crow Bird Bath Decor.

Primitive Crow Bird Bath Decor

Primitive Crow Bird Bath Decor

In the top photo, you'll see that I stenciled on a little primitive crow into the "bowl" of the bird bath. I actually used acrylic paint for that. Then I just added the pot underneath, along with a candle ring of pip berries, which also has some Rusty Tin stars on it. And I added a little resin crow as a finishing touch.

I just wanted a simple little project that could serve as Primitive Home Decor. This is small enough to be used on a table top, as part of a centerpiece. It could also be used just as decor on a small shelf. You could put a votive in the top too, but if you burned it, the wax might be too much for the small "bowl." So maybe a tealight candle would be better. :)

Linking up to the I Gotta Create link party. 

08 April 2013

Primitive Crow Scoop Nest

It was a very productive day in the studio yesterday. I got some paintings started and several craft projects done as well. And it was such a gorgeous day--with the sun shining so brightly in the studio windows. Loved it!

One of my weekend creations was the Primitive Crow Scoop Nest.

Primitive Crow Scoop Nest

I used a Rusty Tin scoop that I filled with Pip Berries and Spanish moss to make the nest. I added a Primitive Crow and a few cinnamon sticks to finish it off. Love it!

02 April 2013

Primitive Scent Sacks

I'm always looking for ways to give fun Primitive Gifts and I think these Primitive Scent Sacks are sure to please anyone who loves to scent their home.

Primitive Scent Sack Gift

My Scent Sack is Cinnamon Bun themed and has several goodies inside. It contains the following items...

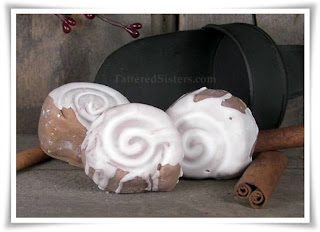
Cinnamon Bun Wax Melts

Prim Fixins Primitive Room Spray
Cinnamon Bun Primitive Room Spray

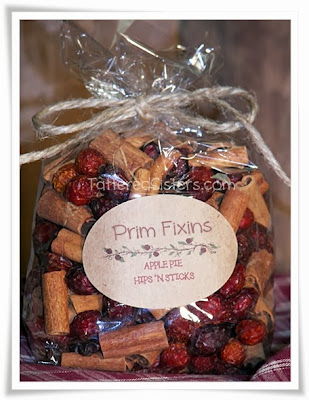
Prim Fixins Hips n Sticks
 Cinnamon Bun Hips 'n Sticks Prim Fixins

Primitive Refresher Oil

All you have to is just fill your sack with your favorite scented items. Punch a couple of holes on either side of the top of the bag and add a prim ribbon or some homespun. And add a cute label.

25 March 2013

Primitive Easter Egg Topiary

I figured I had time for one more Primitive Easter project before next weekend, so when I was in my studio over the weekend, I created this Primitive Easter Egg Topiary.

Primitive Easter Egg Topiary

All I did was take a plain plastic Easter egg and decoupaged it with some old newsprint tissue paper that I had on hand. Then I used stamping ink in brown and copper and dabbed it on all over the egg once it had dried. Then I added a homespun tie and a Rusty Tin star and hot glued the egg to a cinnamon stick. I put some Spanish moss in a small rusty tin bucket, and inserted the cinnamon stick. And that's all there was to it. :)

20 March 2013

Goodbye, Google Reader

Goodbye Google Reader

I've been using Google Reader for years to stay on top of my blog reading. I follow about 150 blogs at the moment (it used to be more), and Google Reader has always been my reader of choice for keeping up with them all. It's nice to have them all in one place, and I liked the GR format so once I tried it I just kept using it.

So imagine my surprise (and annoyance) the other day when I checked into GR and there was a message saying that Google Reader would be discontinued in July! Um, come again? What the heck are you doing to me, Google? You own most of the Internet, and yet you are constantly taking away things I love. First it was Google Friend Connect...now this?! Sigh.

Anyhoots, Google provided me with a link to be able to export the blogs I follow in GR using their Google Takeout service. So I have done that. There are many reader services that will let you import that file so you don't have to lose all of your favorite blogs when GR closes this summer. But I did a little, um, Googling, and found a couple of alternatives to GR that don't require any importing (as long as you do it before GR closes). The two I'm trying out at the moment are Bloglovin and Feedly.

Bloglovin Reader

Feedly Reader

Both of these reader services are very easy to use, and both allow you to connect ans sync with your Google Reader/Blogger Account with just the click of a button (no importing of files is necessary). Feedly has more of a magazine format and takes quite a bit of getting used to, but I do like it. It has a lot of options you can adjust for how you want the blog posts displayed. Bloglovin is a little more user-friendly and simple. 

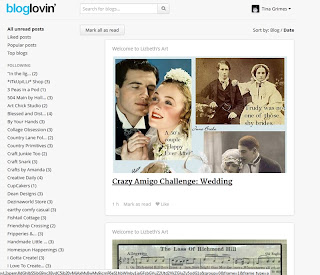
Here is a screenshot of my Bloglovin home page, so you can see how it looks:

Blogloving Home Page

And here is a screenshot of my Feedly home page, so you can compare:


So far, I'm leaning toward the Bloglovin reader because I think it's just simple, straightforward, and easy to use. It lists all the blogs I follow on the left side of the page, and I can sort them by Date or by Blog. And Bloglovin also generates Follow Buttons for you that you can place on your blog. I've already added mine to the right side of this blog (so be sure to follow me if you sign up with Bloglovin!)

Feedly is a little slicker, and has more display options, and even color themes for the layout, which is very nice. My followed blogs are grouped into my GR categories on the left side of the page (rather than individually). Both services let me connect to Facebook if I want. Both readers also have apps that you can download so you can easily follow your blogs on your mobile devices as well.

I'm going to keep using both of these reader services for now until I decide for sure which one I like best. Google Reader will be around until July, so we have time to take things for a good, long test drive. But I do suggest you start looking for your new service now, instead of waiting until the last minute. There are many other choices out there, people. I'm only listing two because these are the two I have tried. So do a little research and find the one that is best for you. :)

18 March 2013

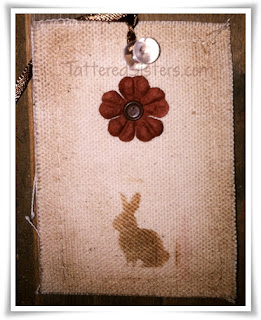
Primitive Easter Bunny Tag

I was quite busy in the studio over the weekend doing everything from attempting to mosaic a rock, mixed media painting, painting jars, and this...my Primitive Easter Bunny Tag. I just wanted to create a very simple muslin tag that would work for a Primitive Easter gift. I was going to make a muslin bag to match, but haven't quite done that yet. 

Primitive Easter Bunny Tag

The "tag" is actually a muslin ATC blank I got at Michael's. They're really a perfect size to be used for Primitive Hangtags. (Michael's has burlap ATC blanks too, just FYI.) I grungy'd up the tag, then stenciled on a little bunny using Tim Holtz Distress Ink. Then I added a fabric craft flower with a button brad. I finished it by  punching a hole in the top and adding a brown ribbon.

So now I have a very simple (and easy to make) muslin hangtag to use on a gift. :)
11 March 2013

Bunny Butt in a Bucket

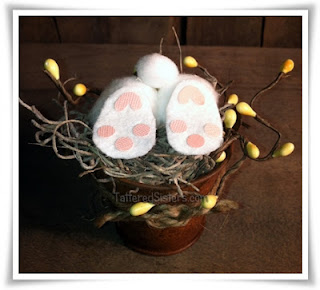
OK, I saw something like this on Pinterest over the weekend and I could not resist making one for myself. It's supposed to be a bunny jumping into a bucket, so all we see is his cute little Bunny Butt. 

Primitive Bunny in a Rusty Tin Bucket

I used a Rusty Tin bucket to create mine, along with some Spanish moss and some Pip Berries. The one I saw on Pinterest used all pom-poms and felt for the bunny, but I only had one white pom-pom in my entire studio (figures!). So I used cotton balls to make the bunny butt instead. I used white felt for the feet, and the pink toe pads are actually made from paper because I was out of pink felt too (naturally!). I think it turned out cute and it was super easy to make. These would make fun little Primitive Easter gifts. You could use tan pom-poms or pink ones, or any pastel color, or even gray! This could be a fun project to do with the kiddos too.