Showing posts with label Shabby Prim. Show all posts

07 January 2017

Grungy Primitive Muslin Bags

I am feeling a little nostalgic. I don't post much on the blog anymore because I re-focused my creative energy into to my art blog (Art Chick Studio). In doing more art, I just don't do as much crafting anymore...though I do still love primitive crafts. So I just thought that from time to time I might share some of my favorite primitive crafts with you.

For now, I'd love to share one of my absolute favorites: Grungy Primitive Muslin Bags. I have used these in a multitude of ways over the years. The following are some of my faves. I think the Flour and Sugar bags were the first grungy muslin bags that I created.

Primitive Grungy Flour Sugar Muslin Bags Set

Grungy Primitive Drieds and Herbs Muslin Bags

Grungy Primitive Candles in a Muslin Bag - Simplify

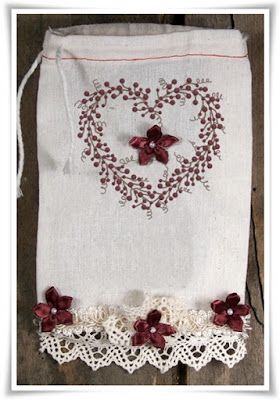
Grungy Primitive Pip Berries Heart Muslin Bag Tattered Sisters

In most of these I simply added stenciled words onto the bags. In the bottom one, with the heart, that was an iron-on I created from a graphic. Most of these are meant to be purely decorative--like the Sugar & Flour Set, and the Drieds & Herbs set. The candles in the bag can be used, and then the bag re-used for something else. 

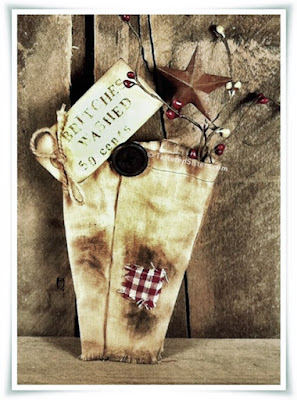
But you can also use muslin bags to create other things--things you might not even recognize as muslin bags once you're finished. Like these Primitive Britches.

Grungy Primitive Britches - Tattered Sisters

Or how about this Primitive Grungy Bunny Bag?

Primitive Grungy Bunny Bag - Tattered Sisters

You can even make things that are maybe a little bit more Shabby than Prim. Like these two creations.

Shabby Primitive Grungy Muslin Bag - Tattered Sisters

Shabby Primitive Muslin Bag with Lace - Tattered Sisters

As you can see from these examples, I've had a lot of fun with muslin bags, grungy and otherwise. It's always a fun creative challenge to see what new ways I can come up with to use muslin bags in craft projects! 

What do YOU like to do with your muslin bags?

17 February 2014

Shabby Prim Fabric Hang Tag

I've been so focused on doing my art and art journaling lately that I haven't done a lot of crafting. I'm sorry for that. But sometimes I just have to switch gears and follow what my creative spirit is telling me to do. I do want to share something with you today, so I hope you'll like this Shabby Prim Fabric Hang Tag.

Shabby Prim Fabric Hang Tag

I really don't sew often. I don't enjoy it much. ;) But every once in awhile I don't mind doing it, especially when it's something small like this. It's different, and definitely a little bit shabby and a little bit primitive.

13 May 2013

Muslin Bags 5 Techniques

I wrote an article once on some different ways you can use Muslin Bags in your crafting. Since I use muslin bags a LOT in my primitive crafting, I thought I'd share the techniques here as well, in hopes it may spark some ideas for you.

Muslin Bags 5 Techniques


  1. Stenciling: After making this muslin bag into a Grungy Good I used a stencil to add the word, 'Fixins' to the bag.
  2. Sewing Embellishments: I created a fabric flower out of some fabric scraps, and then sewed it onto a grungy muslin bag, then added some buttons as well.
  3. Painting: Muslin is easy to paint on, so you can always add some acrylic paint to create characters, letters, images, or what-not to your bags.
  4. Spray Painting: I used brown textured spray paint on this bag, along with a paper doily used as a stencil. It gave a neat, aged leather look to the bag. This is on of my Shabby Prim creations.
  5. Rubber Stamping: I used three different rubber stamps on this bag, one was a text stamp, one was the butterfly, and one was the word, 'believe.' I also sewed on some ribbon trim and a fabric flower. Not quite prim, but you get the idea.
The way I see it, plain muslin bags are little blank canvases, begging to be embellished in some way. Use them plain, use the grungy, use them with paint or stamps, or notions--or whatever you can think of. You're only ever limited by your imagination. And they make perfect gift bags too!

02 January 2013

Love Heart Altered Art

Now that the holidays are over I thought I'd start thinking about Valentine's Day. It will be here before you know it! So I thought I'd share this Love Heart Altered Art.


I made some of these a couple of years ago for my other blog, but wanted to do a new one because I love how they turned out the first time. The heart is wood, and I've added a black and white patterned scrapbook paper to the top of it. There's a vintage photo, a button, and some ribbon too. If you drill some small holes in the top of the heart, you can add some ribbon so that you can hang this up. It would be cute on a small Valentine tree, or even hanging on something else. Great as a gift too! Granted, it's more Shabby Prim than primitive, but you could do lots of things to make this much more primitive.

10 December 2012

Shabby Prim Pips and Flowers Gift Bag

I thought I would create something new to add to my Shabby Prim category, and something that would fit in with December for a Primitive Christmas, so I came up with this Shabby Prim Pips and Flowers Gift Bag.

Shabby Prim Pip Berries and Flowers Gift Bag

This is created with a pre-made plain muslin bags (I never make my own muslin bags, just FYI). As always, you can find a link to my muslin bag supplier on my Primitive Crafting Supplies page. The pip berries heart wreath was added with an iron-on. The flowers, lace, and trim were all sewn on by hand.

I think this would make a sweet little gift bag, don't you? Then afterward, the recipient can use it for all sorts of things. So add a gift inside and it becomes two gifts in one!

24 August 2012

Shabby Prim Bucket Light

Time for another bit of Shabby Prim goodness. This time I'm sharing with you my Shabby Prim Bucket Light.

Shabby Prim Bucket Light


I took a small Rusty Tin bucket, and I added some cream-colored lace to the upper edge of it. I also added a cute little satin flower to the front of the bucket. Then on the inside is a battery operated votive candle. I know, you can't see it. I forgot to snap a photo of that part. LOL  What I love about this is that it's so easy to do and yet it looks so cool. It's a great little piece of Primitive Lighting that also fits the Shabby Prim bill.

You could make a bunch of these for a party and they would be wonderful table lighting and decor. Then give one to each of your guests as a party favor to take home. Or you could wrap one up and give it as an individual gift. They'd also be cute sitting on your kitchen counter or on a little shelf. Or hang them from hooks somewhere inside or outside your home! They cast a nice, warm glow when the light is on.

16 August 2012

Shabby Prim Canvas

I promised you more goodies in my new Shabby Prim category, so I best live up to my word. :) This was project number two that I created last weekend, my Shabby Prim Canvas.

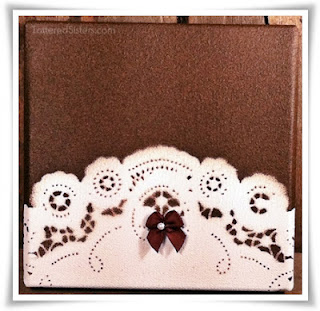
Shabby Prim Canvas

I created this basically the same way I created the Shabby Prim Bag. I used a little bit of spray adhesive on the back of a paper doily, then I positioned it where I wanted it on the canvas. Next I sprayed on a coat of my brown textured spray paint (on the top and sides), let it dry, then sprayed it again. Then I removed the the doily. I LOVE how this looked right at that moment, but then I decided to add a little brown satin bow to it too, for just a little extra touch. 

So this has that rustic, grungy primitive look, with a touch of shabby chic too. It's a 6" canvas, so it could go in so many places. But I haven't made up my mind as to its final destination yet. I do love how it turned out though!

14 August 2012

Shabby Prim Bag

I decided to started a new category here at Tattered Sisters, and it's called Shabby Prim. I decided on this over the weekend as I was getting creative in my studio, trying to come up with new primitive crafts to create. This Shabby Prim Bag is the first thing I came up with.

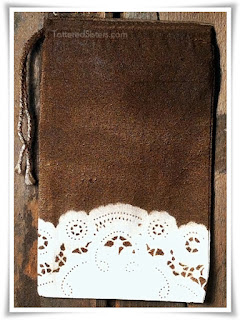
Shabby Prim Bag

All you need to make this shabby prim bag is a ready-made plain muslin bag (no sewing necessary!), a paper doily (you could use a cloth one too--but I didn't want to ruin a real one), some spray adhesive, and some brown textured spray paint. First I sprayed a little adhesive on the back of the doily, and then placed it over the bottom edge of the bag. You can place it as high or low as you'd like. Once that was in place, I sprayed it with the brown textured spray paint. I let that dry (with a little help from my heat gun) and then gave it another coat. Then I removed the doily and voila! It was finished. :) You could spray the back too, of course, especially if you're using this as a gift. But I just did the front side on my sample so that you could see the results.

I love the combination of the Grungy Goods look, and the touch of shabby elegance that the doily provides. And the textured spray paint actually gives the bag the look of old leather, which was a happy accident! I love when that happens. You could fill this bag with grungy candles, pip berries, Sweet Annie, drieds, or whatever you'd like. What do you think?