24 April 2012

Primitive Jar Candle Freebie

Well, I enjoyed making yesterday's Primitive Freebie graphic so much I decided to make another one. This time it's a Primitive Candle in a Jar animated graphic. I've got this in two sizes for you.

Again, these are free for use on your website or blog. Just don't claim them as your own, sell them, or hotlink to them. Oh, and note the watermark on this one--it's from my new Tumblr blog, My Enchantments, because I posted it there first. Feel free to pop over and have a peek at it. If you like fairies, fantasy, and magic, you'll probably enjoy my blog. :)


23 April 2012

Primitive Candle Freebie

I'm doing something a little different today. I created a Primitive Freebie that I want to share with you, and this time the Primitive Graphic isn't a printable, but an animated graphic. And I've created it in 2 different sizes for you.

Tattered Sisters Primitive Candle
Tattered Sisters Primitive Candle B

Feel free to use these on your website or blog, but do not claim them as your own or sell them for profit. To save these, just Right-Click on your image of choice and then Save it to your computer. Please do not hotlink to these images or they will be deleted.

I love Primitive Candles, so I just thought it would be fun to create a Primitive Candle graphic. Hope you like it!

19 April 2012

Primitive Cat Pattern

Those you who have followed me for awhile know that sewing isn't my favorite thing. It's not something I do often because I'm just not the greatest at it. And when I do sew it has to be something simple. But you all may also know that I'm not just a crafter, but also an artist (and a licensed art educator!) who likes to draw, among other things. So I decided to draw a little Primitive Cat, and I also decided it would make a great easy Primitive Pattern too. Mind you, I haven't sewn it yet. LOL But I will at some point. That isn't gonna stop me from sharing it with you though!

This is what the Primitive Cat Pattern looks like:

Primitive Cat Pattern Photo

And you can download it for FREE by clicking on the link below.


This pattern has two options for the tail, so you can choose if your cat should have its tail up or curled down in front of him (or her). Just cut it out whichever way you'd like your cat to be. The pattern is in PDF format so it will print full size for you.

It should go without saying that this is my original creation and should not be claimed as your own or sold for profit. If you want to share it, please do so by posting a link to this pattern directly from your website or blog etc. That includes pinning on Pinterest--there's a Pin It link at the bottom right of this post, so please use it if you'd like to share it that way.

How to Coffee-Dye Muslin

I recently coffee dyed some muslin for the first time. I have coffee dyed muslin bags many times using my Grungy Sauce Mix recipe that I shared in my Grungy Hang Tag Tutorial. But I had never actually coffee dyed muslin fabric, and I decided it was time to give it a go so I would have some grungy muslin on hand for craft projects. So I looked around online for various "recipes" and "how-to's" for doing this, and I ended up combining the basics of several tutorials to do my fabric. And I thought I would share that Primitive Tutorial with you.

What You Need
  • A hot pot of double-strength coffee, or enough instant coffee made to equal the same.
  • 1 TBSP Vanilla Extract
  • 1 Yard Muslin Fabric
  • 1 Cup of Soda Ash (*optional-see #1 below)
  • A Gallon of Warm Water (*optional-see #1 below)
  • Small Plastic Tub or Large Bowl (or a bucket)--something just big enough to hold the fabric covered with the coffee/water.
  • Rubber Gloves
  • A Large Spoon

Directions
  1. Now this first step is optional. But if you're wanting to help set your coffee stain to make it more permanent, this is an easy way to do it. Take your plastic tub and fill it with the water and the Soda Ash. Stir to dissolve the soda ash. Put your gloves on (soda ash can be irritating to skin). Add your fabric and soak for 20 minutes, then wring the water out of the fabric. Do NOT rinse the fabric. NOTE: Soda Ash is very inexpensive and can usually be found in craft stores wherever tie-dye supplies are sold. You can also order it online. Also note, Baking Soda is NOT the same thing. And you can skip this step all together if you want to.
  2. Empty the plastic tub and pour in your hot Coffee and Vanilla. Wear your gloves if you're worried about the hot coffee, or about getting the color on your fingers. Add the fabric into the coffee and stir it around a bit to make sure the coffee gets on all of it and get it submerged.
  3. How to Coffee Dye Muslin
  4. Soak your fabric for 10-15 minutes and then check it. Keep in mind that it will dry LIGHTER than it looks wet. If you want it darker, soak it for another 10-15 minutes. How long you soak it is really up to you. I soaked mine for about an hour or so. I know people who soak theirs overnight. If you're unsure how long to soak, do it with some swatches of test fabric first, soaking for various times. That way you can gauge how long it takes to get a color that you like, before you actually soak your full yard of fabric.
  5. Once your fabric is the desired color, remove it from the coffee bath. Mine was a bit too dark after a long soak, so I rinsed it in cold water. But rinsing is optional at this point so only rinse if you need to lighten it a bit. Again remember, the fabric will look lighter when it's dry than it does when it's wet. Wring out the fabric--wearing  your gloves (again, to avoid staining your fingers).
  6. Now you need to dry your fabric. You have three options: Air Dry, Oven Dry, or Dryer. If you choose the Oven Dry method, I would set it at no higher than 225° and lay the fabric on a cookie sheet, turning every 5 minutes (and keep an eye on it!). The oven method will add more grungy effects, which you can enhance by adding crumpled foil to your cookie sheet first. If you choose the Dryer, you may want to put the fabric inside an old pillow case first, in order to protect your dryer from the stain. If you use the Air Dry method, you can also enhance the grungy effect by using a hot iron on almost-dry fabric.
Coffee-Dyed Muslin
Air-Dried Muslin

Oven-Dried Muslin
Oven-Dried Muslin--with Wrinkles
Options
  • You can add Cinnamon (and even other spices, if you like) to your coffee dye for some added scent and color.
  • You can crumple the fabric before dying it to give it a more grungy look and add a sense of texture. You can also crumple it as it's hanging up to dry.
  • If you're making dolls or other projects, you can put your coffee dye mixture into a spray bottle and spritz some onto your project for some added grunge and texture.
  • Add some more age to your coffee dyed fabric by rubbing it with some sandpaper in spots to give it a more worn and aged appearance.
  • You can use tea instead of coffee to make your dye, but it will not usually get as dark. You can experiment with both to see which you prefer.
You can't really do this wrong because the "primitive look" isn't about perfection. It's about looking worn and aged, something you will achieve with the dye process. I hope you have fun making lots of primitive Grungy Goods with this tutorial!

15 April 2012

Primitive Britches

I was in my studio today and trying to recycle some leftover craft items into a new craft project. My main item was part of a grungy muslin bag that had the bottom cut off, which I was bound and determined to turn into something. So this is what I came up with: Primitive Britches!

Primitive Britches
All I did was some creative folding to make this partial muslin bag look like a pair of "britches." I hot glued the folds/edges together, added some extra grungy effects, glued on a gingham patch, and sewed on a button. I also distressed the bottom edge of the britches and added some Pip Berries and a Rusty Tin Star. I finished this off with a little grungy hang tag that reads, "Britches Washed 50 cents."

These Grungy Goods would look cute in a primitive laundry room, don't you think?

03 April 2012

Subscribing to Blogs

Recently I posted about how Google Friend Connect would be disappearing from non-Blogger blogs by the end of March. And there's talk, though unconfirmed, that it will disappear from Blogger blogs too by the end of the year. I have been using that gadget to subscribe to blogs for ages, and I've used it on my own blogs, both Blogger and WordPress. Of course, the gadget has disappeared from my WordPress blogs now. And it's come to my attention that many people don't know any other way to subscribe to a blog without using GFC. So I'm writing this little tutorial on how to subscribe to blogs without using GFC. This isn't just Blogger Tips, it's good for any blog platform.

First, you need to know that you can subscribe to a blog in (at least) 4 ways:
  1. Using Google Friend Connect (if they are on Blogger and if they use it), though who knows for how long.
  2. Via Email. Just look for an email subscription form on the desired blog. Mine is in the left sidebar. (See photo below) Mine is provided by Feedburner, but Blogger makes a Gadget for this too! An email subscription is awesome, because it sends every new post right to your email inbox.
  3. Via Subscription Links. I have these also, directly above my email subscription form. And Blogger makes a Gadget for these too! (See photo below).
Blog Subscriptions
   
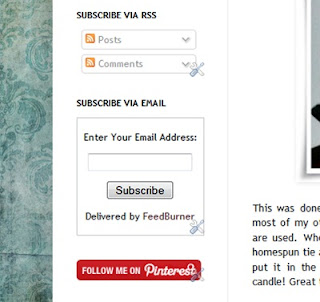
  4. Manually, in A Reader. I use Google Reader myself, so my tutorial (below) will show instructions for a manual subscription using Google Reader.

Before I show those directions, if you're on Blogger, make sure you make it easy for people to follow your blog. Blogger has 2 Gadgets to help you do this, as noted above. One is called Follow by Email. And one is called Subscription Links. So just go into your Layout and add those to your sidebar, preferably near the top of the blog, to make them easy to spot. Who knows how many potential blog followers you have lost if you don't already have these gadgets on your blog!

Subscribe via Email Gadget

Subscribe via Feed Links


Now for the tutorial on Subscribing to Blogs in Google Reader.

Step 1
Find a blog you want to subscribe to. Then go up into your browser's address bar and copy the blog's URL. (Example: BlogILove.blogspot.com).

Step 2
Go to Google Reader and click the Subscribe button.


Step 3
Paste the blog URL that you copied in Step 1 into the box that appears underneath the Subscribe button after you clicked on it. Then click ADD.

Subscribe in Google Reader Box

That's it! You've just subscribed to that blog. Go ahead and try it. It's super easy. And when you're finished, be sure you check your own blog to make sure you have those subscription gadgets added to your own blog, so that you make it super easy for people to follow your own blog too! And hey, spread the word. If you didn't know how to do all this, I guarantee you there are many other folks who don't know how to either. So Pay it Forward. We bloggers have to stick together, right?

02 April 2012

Grungy Primitive Candle

This is a Grungy Primitive Candle in a Rusty Tin candle pan that I did for my living room. Don't you love Primitive Candles?

Grungy Primitive Candle

This was done the same way I did my Grungy Primitive Tapers and most of my other Grungy Goods, where wax-dipping and spice-rolling are used. When I finished getting it grungy, I just added a mustard homespun tie and a little sprig of Pip Berries for some color. Then I just put it in the rusty tin candle pan. Super easy and grungy primitive candle! Great to use anywhere in your primitive home.