18 December 2012

Primitive Snowmen Sleigh Ride

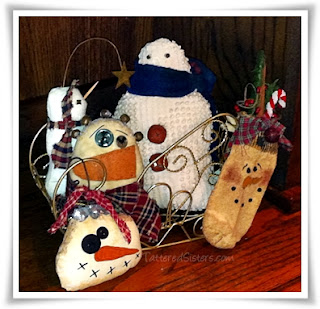
So what do you do with a bunch of Primitive Snowmen ornies that you end up not putting on your Christmas tree this year? Well, you send them on a sleigh ride of course! That's what I did anyway.

Primitive Snowmen Sleigh Ride

I have a lot of primitive snowmen ornies, and since I didn't do a primitive Christmas tree this year, I decided I needed a fun way to display some of my favorite snowmen ornies. So I used another decorative sleigh I had in my Christmas decor and put a bunch of snowmen in it. I've got this sleigh full of snowmen sitting on my dining room hutch. I love their happy little faces!

11 December 2012

Grungy Primitive Christmas Believe Card

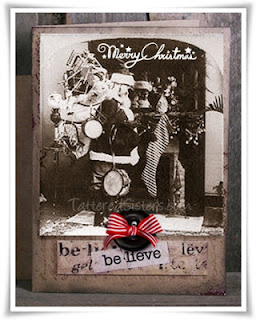
I felt like creating some Altered Art the other day, so I came up with this Grungy Primitive Christmas Believe Card.

Grungy Altered Art Primitive Card

I used a Vintage Photo of Santa, added to a brown Kraft card that I made good and grungy using distress ink (by Tim Holtz). I also used a text rubber stamp on top of the card. I added a 'Believe' word sticker, an old button, and a touch of ribbon for a pop of color. Just a cute little primitive Christmas card, ready for giving.

10 December 2012

Shabby Prim Pips and Flowers Gift Bag

I thought I would create something new to add to my Shabby Prim category, and something that would fit in with December for a Primitive Christmas, so I came up with this Shabby Prim Pips and Flowers Gift Bag.

Shabby Prim Pip Berries and Flowers Gift Bag

This is created with a pre-made plain muslin bags (I never make my own muslin bags, just FYI). As always, you can find a link to my muslin bag supplier on my Primitive Crafting Supplies page. The pip berries heart wreath was added with an iron-on. The flowers, lace, and trim were all sewn on by hand.

I think this would make a sweet little gift bag, don't you? Then afterward, the recipient can use it for all sorts of things. So add a gift inside and it becomes two gifts in one!

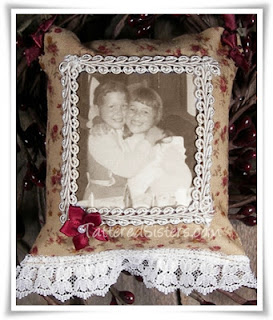
Sister Vintage Photo Fabric Ornie

I want to post this other Vintage Photo Fabric Ornie before I forget about it. This is one I made that has a vintage photo of my sister and me when we were little. I'm the one on the right in the photo.

Vintage Photo Fabric Ornie

I think I was about 6 or 7 in that photo, so my sister would be 8 or 9. It's not totally a primitive ornie, I realize. But it still looks cute on a Primitive Christmas tree. :) When I have all my handmade Primitive Ornies on the tree, it fits right in. One of these days I think I'll make some with photos of my daughter and grandkids too.

07 December 2012

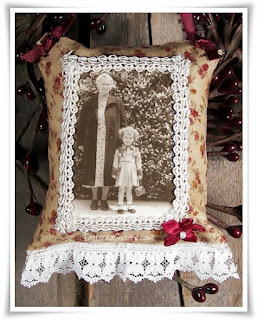
Vintage Photo Fabric Ornies

As I was decorating my Christmas tree after Thanksgiving, I pulled out some Vintage Photo Fabric Ornies that I had made 2 Christmases ago. I made two sets of them, one for me, and one as a special gift for my mother. Since my mother passed away this year, these vintage and almost Primitive Ornies are even more special to me. So I thought I'd share them with you. I used scraps of a vintage rose-look fabric and lace, along with some trim to make these. Very simply to make. And the photos were printed on ink jet fabric, which I bought at an office supply store.

Primitive Ornies with Vintage Photos

Primitive Ornies with Vintage Photos

The top ornie shows a photo of (from left to right) my great grandmother, my mother, and my Nana (my mom's mother). They were on a trip to New York City. And actually I found out on Mom's last visit last year that the Statue of Liberty was in the background when this photo was taken--it's just no longer visibile in the old photo.

In the bottom photo are my great grandmother and my  mother. They were very, very close, so this was a very special ornie to make for my Mom. She said she cried when she opened these. And here I sit crying as I type this. I miss Mom so much, and it's so difficult at Christmas time. Her tree was still up in January...she had gotten sick and passed away so suddenly, she didn't have a chance to take it down. Her set of these ornies were still hanging on the tree. I gave them to my sister so she would have a set too.

But enough tears! I am going to try and focus on the many wonderful memories I have of her and my whole family. And hopefully Mom can help me from Heaven to keep my happy Christmas face on. :) I have another ornie I made for my sister as well. I'll post that another day. In the meantime, I hope these give you a little creative inspiration.

02 December 2012

Snowballs in a Jar

Are you trying to think of some fun Primitive Gifts you can give this year that don't cost a lot? How about some Snowballs in a Jar?

Primitive Wax Melts Snowballs
All you need to do is get some Primitive Wax Melts that look like snowballs and put them in a jar. Add a bit of homespun, and you have one super easy primitive gift ready for the giving! What could be more fun that snowballs that will not melt...well, at least not until you want them to. 

If you need a little help finding some snowball wax melts, here


01 December 2012

Vintage Lady Christmas Tree Tags

I've got a holiday Primitive Freebie for you today. I've created a sheet of small tags that feature a Vintage Lady and a Christmas Tree...perfect for your Primitive Christmas gifts. This is what they look like:

Primitive Freebies Vintage Christmas Tags

The sheet I created is in PDF format and includes 12 tags. Just click on the image above and that will take you to the PDF that you can download and save to your computer. These tags are small, about 1-1/2" x 2" in size, perfect for small gifts. And if you want to get really creative, print the entire sheet on a full paper-sized adhesive-backed sheet (you can get these at office supply stores) and then cut them out and use them as stickers too. So really, it's like 2 freebies in one. :)

26 November 2012

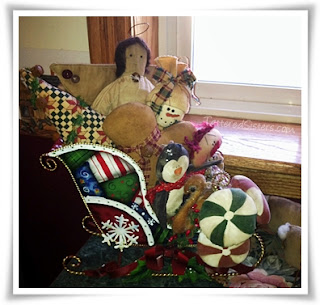
Primitive Christmas Ornies Sleigh

Believe it or not, I am not doing a Primitive Christmas tree this year. I've done that for about 5 years now and just wanted to do something different this year. I got a new tree too, since my old one was on its last legs, which definitely helped motivate my decision to shake things up a bit. But I love my Primitive Ornies so much, I just had to find some ways to still use them for Christmas. So I decided to take a small decorative sleigh I have and fill it with some primitive ornies!

Primitive Christmas Sleigh Decor

Look closely and you'll find a tree ornie, a primitive angel ornie, a snowman peeking thru, a gingerbread ornie, a penguin, a swan, a happy little raggedy, and even some prim candies. I think they're quite happy in their sleigh, enjoying the view out of my kitchen window. And even though they're not on my tree, I still get to enjoy the ornies too. :)

25 November 2012

Primitive Christmas Centerpiece

Forgive my absence...I've been busy decking the halls and attempting holiday cheer. It's the first Christmas without my mom. It would be so easy to flip the switch and wallow in my own sorrow, but Mom wouldn't want me to do that. So the holiday cheer switch is on (for now) and I'm getting this house Santa-fied like nobody's business!

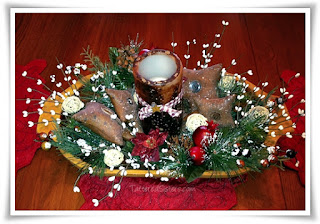
First up, my Primitive Christmas Centerpiece. I always have the same basic centerpiece on my dining room table; I just change up how it looks from season to season, or holiday to holiday, as the case may be. I just finished up the Primitive Christmas look for this year.

Primitive Christmas Home Decor

There are some Christmas greens, poinsettias, fabric stars, white Pip Berries (which I actually found at JoAnn Fabrics the other day!), and one of my Prim Flickers flameless candles in the center. What do you think? I love how it turned out. It definitely makes the table and room look a bit more festive.

More to come!

12 November 2012

Gingerbread Wax Melts

Are you looking for a quick and easy hostess gift for someone this holiday season? Or maybe you want a quick project to do up for a craft show? If so, some Primitive Wax Melts are quick and easy and sure to please in either scenario.

Primitive Wax Melts

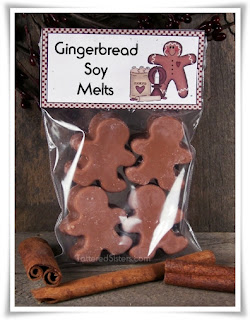
Gingerbread Wax Melts are perfect for gift-giving (or selling, as the case may be) this time of year. Just package up several of your favorite gingerbread wax melts in a clear bag, add a bag topper, and voila, you're done!

And to help you get started making some of these, I'm giving you a free Gingerbread Bag Topper image that you can use to make your own bag toppers. Don't you love Primitive Freebies? Just click on the image below to open it, then right-click and save it to your computer.

Gingerbread Bag Topper

Note: I've made this a fairly large image so that you can resize it to suit your needs. And you could use also use this as bag topper for Primitive Gingerbread Dough Ornies, or all sorts of things!

09 November 2012

Primitive Reindeer Love

I was checking out the EZ Craft Show Online Holiday & Gift Show yesterday and found some wonderful Primitive Christmas decor. I've only made one purchase (so far) but I love these Primitive Reindeer that I found from the Barefoot Horse Candles & Gifts booth.

Primitive Reindeer

Aren't they fabulous? I needed some new primitive Christmas decor for my home, so these will be perfect. And I love to buy handmade whenever I can. Be sure to check out the EZ Craft Show and look through all the booths. There are many handmade treasures to be found! Just click on the text link in the first paragraph and it will take you straight there. Go on, get shopping!

12 October 2012

Cinnamon Salt Dough Recipe

I love making Dough Ornies, but I wanted to try a new recipe, so I thought I'd try a Cinnamon Salt Dough Recipe. This Primitive Recipe is pretty common, and has lots of variations. I think it's a very flexible recipe that you can't really mess up. I used my own variation to create these Primitive Fall dough ornies to use as Primitive Bowl Fillers.

Fall Acorns Dough Ornies Bowl Fillers

Fall Leaves Primitive Dough Ornies

The Recipe
  • 2 Cups Flour
  • 1 Cup Salt
  • 1/4 Cup Cinnamon*
  • 1-1/2 Cups Water
Mix all the ingredients together and work into a dough. You can add a little extra water if the dough is too dry, or a little extra flour if the dough is too wet. Knead the dough several times. Then you roll it out onto a surface dusted with cinnamon, and to your desired thickness (at least 1/4"). Cut out with cookie cutters of your choice. Bake at 300° for 45-60 minutes, making sure to check them during the last stage of baking so that they don't overcook or burn! The thicker they are, the more baking time they're likely to need. Let them cool completely before you handle them.

After mine were finished I used some diluted craft acrylic paints to kind of give my ornies a wash of color. For the acorns I just did the top half of the ornies so they would look more like acorns. For the leaves I painted the entire shape, using various colors to look like fall leaves. You don't have to dilute the paint if you don't want though, it's up to you. I just didn't want a very dark color on my ornies.

These can be sealed with melted, scented wax, as I do with most of my dough ornies. Or, you could purchase a spray to seal. Krylon makes a clear acrylic spray paint, and they also make a "triple thick clear glaze" you could use.

*A note about the cinnamon: I used a small portion of cinnamon so that my ornies didn't get too dark. If you are planning to make ornies that you DO want to be darker, like for gingerbread men, for example, you can use an entire cup of cinnamon. The more cinnamon you use, the darker the ornies will be. I knew I was going to paint some of mine so I didn't want them too dark. Do yourself a favor though and get your cinnamon at the dollar store, if you have one nearby. It will much more affordable!

08 October 2012

Primitive Candle Shade with Pip Berries

This is a Primitive Candle Shade that I had tucked away, leftover from when I sold them in my online store. It's meant to sit over a battery operated votive or other battery operated candle. I decided to jazz mine up a bit so I could use it.


This is kind of similar to my Prim Flickers flameless candles, but of course I made the Prim Flickers myself. This candle shade is basically a hollow candle tube, and it's already grungy'd up so I didn't have to do it. I just added some little extras to it and put it on a Rusty Tin candle plate. I added a battery operated votive to the middle, and so when it's on it looks like a real flickering candle.

01 October 2012

Grungy Jar

I decided to try some of my grungy addiction out on a Mason Jar. I just wanted to see how it would look to use some of the textured spray paint I use so often on the jar. So I used some of the spray and got the Mason Jar good and grungy.

Grungy Mason Jar with Spray Paint
First thing to note is that the textured spray paint I used is NOT meant to be used on glass. 


It is an indoor/outdoor paint, but it doesn't say on the can that it can be used on glass. So I just figured I should err on the side of caution and not expect it to hold up...unless I primed it first. So I used an indoor/outdoor spray paint primer on the Mason Jar first, one that clearly states it can be used on glass. Krylon was my primer of choice. So I primed the jar first with a Ruddy Brown color, let it dry, then used my textured spray paint to grungy up the jar. It probably won't last forever, but I'm sure it'll last awhile.

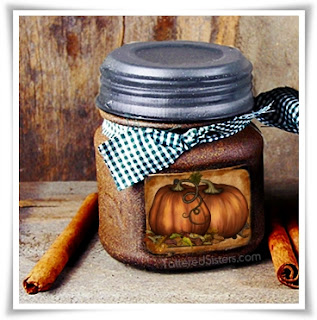
I created a label for the jar with some of my favorite fall Primitive Pumpkin graphics and stuck that to the jar--I added Mod Podge to help it stick. Then I topped it off with a homespun tie. Obviously you can do this to candles in a jar, but you can do it to plain jars too. Put something fun inside--like scented putka pods (mini pumpkins) and use it as a hostess gift or what not. Put some candy corns inside, or some M & M's. It makes a perfect Primitive Gift!

25 September 2012

Gingerbread Men Dough Ornies

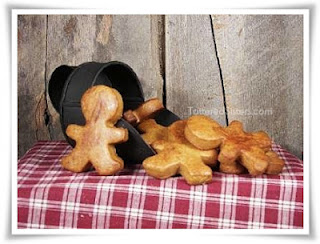
It feels like Fall, y'all, and I'm loving it. So what is something that goes great with Fall? Gingerbread! And who wouldn't love some Gingerbread Men Dough Ornies to help them decorate for the season?

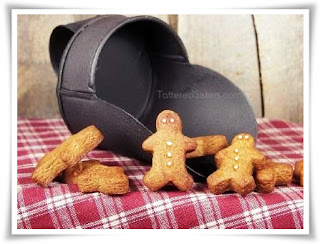
Primitive Gingerbread Dough Ornies

Primitive Mini Gingerbread Dough Ornies

Bot of these sets of Dough Ornies were made with my Primitive Dough Recipe. They are just different sizes, the ones on the bottom being the mini gingerbread men. I seal them up with Gingerbread scented wax. Just keep in mind that the scent on dough ornies like this is not as strong as it is on a candle. With candles, the scent is all the way through the candle itself; with the ornies, there is really only scent on the surface. So it's not going to be strong and the scent won't last forever. But the cuteness will last a good, long time. 

Put some of these dough ornies in a basket, or in a clear cello bag with homespun tie and you have a great gift. Throw them in a bowl with some rosehips, or even add in some mini pumpkins (putka pods) and that would look great on a table. 

24 September 2012

Simmering Spices

I see my Ginger Citrus Simmering Spices show up on Pinterest a lot. So I wanted to share this alternative to those Prim Fixins. I actually made these Simmering Spices before I ever made the Ginger Citrus version, but I guess I thought I'd already posted them at that time.

Simmering Spices

These Simmering Spices are just as easy to put together as the Ginger Citrus. Just start with your favorite Mason Jar. The bottom layer is dried apples. That is followed by layers of cinnamon stick chunks, star anise, whole allspice, and cloves. Of course, you could use any combination of spiced you'd like. Then it's just a matter of adding a homespun bow and a nice lid (the lid I used is zinc). Perfect for gift-giving this fall, over the holidays, or even as a housewarming gift.

Note that all of my sources for this project are listed on the Primitive Crafting Supplies page, the link to which you can always find near the top of the blog (just under the header).

15 September 2012

Primitive Halloween Treat Bags

Time for another little Primitive Halloween goody to share. You might remember my Grungy Boo Bags that I created last Fall. This year I wanted something similar, but a little different. So I came up with these Primitive Halloween Treat Bags.

Primitive Halloween Treat Bags

These are just deeply tea stained Muslin Bags that I've stamped with a pumpkin design and the words, 'Happy Halloween.' Simple, but cute. I had actually made these before, just leaving the muslin bags plain white. But I wanted them to be very prim this time. These would be great for giving away some treats, but you could use these as Primitive Bowl Fillers too, or put them on a shelf with some other Halloween goodies.

There's no sewing involved here either. Sewing isn't my favorite thing...I do it only when I'm super inspired. And sewing a bunch of little bags is not my idea of fun at all! I buy all of my muslin bags ready-to-go. You can can find a link to my source of muslin bags on my Primitive Crafting Supplies page. Save your sewing for the fun projects!

12 September 2012

Witch Hat Pattern

Witch Hat
Since I couldn't provide you with my own pattern for the Primitive Witch Hat that I posted yesterday, I decided to go on a hunt for a free Primitive Patterns for witch hats. Well, it may or not be "primitive," but it is a free pattern and we all know you can you prim up just about anything! So here is a link to a free witch hat pattern that you can use to make your own Witch Hat. Just click on the link below.


(Note: the image above is not of the witch hat made from the free pattern. It's just a witch hat image I had in my stash.)
Happy BeWitching!
(Hope this works for you, Lenore!) :)

11 September 2012

Primitive Witch Hat

I really very seldom decorate for Halloween anymore...I like to keep things more Fall-themed so that I can keep my decorations up for a longer time. But sometimes I get an urge to make something for Halloween. And who can resist a Primitive Witch Hat? So I took the plunge and made one.

Primitive Witch Hat

This hat is made out of felt. I stiffened the felt with some spray starch and let it dry, then repeated. (You could probably use regular fabric stiffener for this, but I didn't have any, so I used starch). Then I formed my pieces and did a little bit of sewing to put it all together. I added a bit of fiberfill on the inside to help the hat keep its shape too. I don't have a pattern for this, folks. Sorry! I was just winging it as I went along, because sometimes you just have to fly by the seat of your broom! Once the basic hat was finished I added my embellishments...some flowers, some buttons, some ribbon here and there, and a little Rusty Tin star.

So I guess I will a wee bit of Primitive Halloween decor this year after all. :)

09 September 2012

Grungy Apples

OK, it's true. I will grungy up almost anything. If I can make something into Grungy Goods, I am only too happy to do it! Case in point: dried apples. Some of you might ask me, why would grungy up dried applies? Yet I would ask you, why not?

Grungy Apples

I grungy'd these up the way I grungy up pretty much all of my Grungy Goods. Dip them in melted, scented wax (apple pie or cinnamon or whatever you like), then dredge in your favorite spices, then dip in the wax again to seal them up. I used metal tongs to do these since they are so thin. 

These are great for Primitive Bowl Fillers and would look great combined with cinnamon sticks and even some putka pods this time of year. You could also string them up and use them as a garland. Or make ornies out of them for your Christmas tree.

03 September 2012

Fall Pip Berries in a Basket

Awhile back I created a basket for my guest bathroom filled with pip berries and rusty tin stars. I decided to redo that basket so that it would help me dress that bathroom for fall. The result is my Fall Pip Berries in a Basket.

Fall Pip Berries in a Basket
I love how this turned out. I added in some picks of fall-colored pip berries, and some that also have leaves and mini pumpkins too. The result is a warm and primitive mixture of burgundy, orange, yellow and green that is just perfect for this time of year...even though it still feels a bit like summer where I am. 

I love Fall and can't wait for the cool, crisp air and falling leaves, and pumpkins, and everything else that goes with this season.

Pumpkin Crow Primitive Hangtag

Wow, it's been awhile since I've done any Primitive Freebies, hasn't it? Well let's just rectify that, shall we?

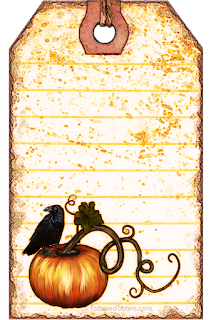
Pumpkin Crow Primitive Hangtag

Once September arrives, I automatically start thinking Fall...even if Mother Nature is still thinking Summer. LOL So I created this Primitive Hangtag printable that speaks to me of crisp air, Autumn pumpkins, and even Primitive Crows! Just click on the image to make it appear full size, then right-click it and save it to your computer. Hopefully you can use this while you're creating some wonderful primitive crafts for the coming Fall season. Enjoy!

27 August 2012

Disqus for Blogger Comments

The Blogger comments system is a lot better than it used to be, but I never really cared much for it. I couldn't reply to comments without visiting the blog itself. I couldn't respond to specific reader comments. I hated the CAPTCHA system, but hated spam even more. So quite some time ago I switched to, in my opinion, a much better option: Disqus.

Disqus
Disqus is a comment system that works great with Blogger, and it is used by many bloggers (on Blogger and many other blog/website platforms) all over the web. I've been using it here on Tattered Sisters almost since I started the blog. I use it on my Tumblr blogs as well. It is really easy to use. It has eliminated virtually all spam comments since I started using it. I kid you not! And it allows people to comment using the Name/URL/Email option, or via Facebook or other social networks, or via their Disqus profile (if they have one)--no CAPTCHA required!

And the best part is, it is fairly easy to add to Blogger. Disqus has a gadget you use to add it to your Blogger blog, which automatically inserts all the necessary HTML and JavaScript into your blog's template. So just follow their directions to add the gadget to your blog. Disqus also has a tool which will import all your existing Blogger comments into Disqus. Note: if you don't import them they won't be lost, but they won't be visible on your blog once Disqus is active. So be sure to import them!

And if you run into any problems, Disqus has great support to help you install and get started using their comment system. I have no complaints at all since I started using Disqus. I highly recommend it to anyone! If you wan to learn more about it, just click on the image above and that will take you to the Disqus website. And did I mention, it's FREE?! Worth a peek, even if you decide not to use it (although I don't know why you wouldn't!).

24 August 2012

Shabby Prim Bucket Light

Time for another bit of Shabby Prim goodness. This time I'm sharing with you my Shabby Prim Bucket Light.

Shabby Prim Bucket Light


I took a small Rusty Tin bucket, and I added some cream-colored lace to the upper edge of it. I also added a cute little satin flower to the front of the bucket. Then on the inside is a battery operated votive candle. I know, you can't see it. I forgot to snap a photo of that part. LOL  What I love about this is that it's so easy to do and yet it looks so cool. It's a great little piece of Primitive Lighting that also fits the Shabby Prim bill.

You could make a bunch of these for a party and they would be wonderful table lighting and decor. Then give one to each of your guests as a party favor to take home. Or you could wrap one up and give it as an individual gift. They'd also be cute sitting on your kitchen counter or on a little shelf. Or hang them from hooks somewhere inside or outside your home! They cast a nice, warm glow when the light is on.

16 August 2012

Shabby Prim Canvas

I promised you more goodies in my new Shabby Prim category, so I best live up to my word. :) This was project number two that I created last weekend, my Shabby Prim Canvas.

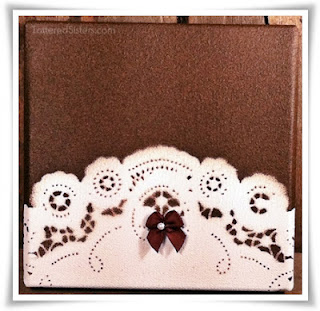
Shabby Prim Canvas

I created this basically the same way I created the Shabby Prim Bag. I used a little bit of spray adhesive on the back of a paper doily, then I positioned it where I wanted it on the canvas. Next I sprayed on a coat of my brown textured spray paint (on the top and sides), let it dry, then sprayed it again. Then I removed the the doily. I LOVE how this looked right at that moment, but then I decided to add a little brown satin bow to it too, for just a little extra touch. 

So this has that rustic, grungy primitive look, with a touch of shabby chic too. It's a 6" canvas, so it could go in so many places. But I haven't made up my mind as to its final destination yet. I do love how it turned out though!

14 August 2012

Shabby Prim Bag

I decided to started a new category here at Tattered Sisters, and it's called Shabby Prim. I decided on this over the weekend as I was getting creative in my studio, trying to come up with new primitive crafts to create. This Shabby Prim Bag is the first thing I came up with.

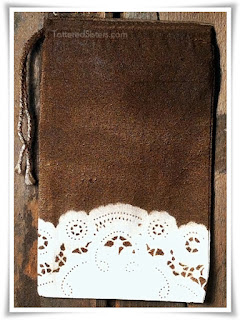
Shabby Prim Bag

All you need to make this shabby prim bag is a ready-made plain muslin bag (no sewing necessary!), a paper doily (you could use a cloth one too--but I didn't want to ruin a real one), some spray adhesive, and some brown textured spray paint. First I sprayed a little adhesive on the back of the doily, and then placed it over the bottom edge of the bag. You can place it as high or low as you'd like. Once that was in place, I sprayed it with the brown textured spray paint. I let that dry (with a little help from my heat gun) and then gave it another coat. Then I removed the doily and voila! It was finished. :) You could spray the back too, of course, especially if you're using this as a gift. But I just did the front side on my sample so that you could see the results.

I love the combination of the Grungy Goods look, and the touch of shabby elegance that the doily provides. And the textured spray paint actually gives the bag the look of old leather, which was a happy accident! I love when that happens. You could fill this bag with grungy candles, pip berries, Sweet Annie, drieds, or whatever you'd like. What do you think?

11 August 2012

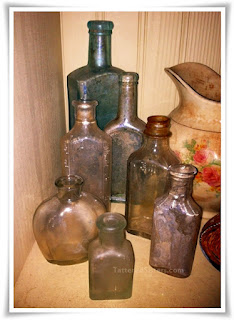
Vintage Bottles

I love old vintage bottles. They are probably some of my favorite Vintage Goods in my home.

Vintage Bottles
Vintage bottles look primitive without having to do anything to them, and they tell a story about the past...even if we may not know what the story is. You can put them anywhere and they add a wonderful touch to your home. Add them in a group and you have a collection. Add them individually to someplace you need a little contrast in texture or height in your decor and the bottle will balance things out for you. 

Some people like to clean their bottles up and make them shiny, but to me that defeats the whole purpose of using vintage bottles. I want them to look old and grungy! I want them to have character. I want them to echo their story from the past, even if it's just a tiny, mysterious glimpse. Don't you?

28 June 2012

Primitive Flowers in Burlap

Burlap is really all the rage these days, and it's such a great material to work with. It can be used any time you want a primitive, country, or rustic touch somewhere in your home. You can even use it to whip up a quick and easy display of Primitive Flowers and Pip Berries.


You can take a small pot of flowers and prim it up like this, which makes it the perfect Primitive Gift too. Just cut some burlap into a circle (or a square--it doesn't matter much) that's a bit bigger than the size of the pot. You can grungy up the burlap with some coffee stain or even just brown ink, if you like. Use a Primitive Crow stencil and some black stencil cream to stencil on your crow. You can use any kind of stencil design you like--it's up to you. I just like crows! 

Once that's dry, put your pot in the center of the burlap and pull up the sides around the pot. Tie it with some jute or some grungy string. Add a primitive or antique-looking key for fun. The just pop in some sprigs of pip berries here and there for a fun prim touch.

04 May 2012

Vintage Cookie Cutters in a Vintage Jar

I love Vintage Goods, especially if they have been passed down through the family. One of my favorite vintage treasures is this Vintage Jar full of Vintage Cookie Cutters that belonged to my grandmother and my husband's grandmother.

Vintage Cookie Cutters in Vintage Jar
I've used many of these to make Christmas cookies with my daughter and my grandson. And my two-year-old granddaughter will be making use of them with me as well one of these days. There's just something warm and wonderful about having a little bit of family history sitting here in my kitchen, and in knowing that our hands have made cookies with the same cutters that their hands used as well. You just can't put a price tag on stuff like that. And the cutters look so nice sitting in that vintage jar too. Gotta love it!

03 May 2012

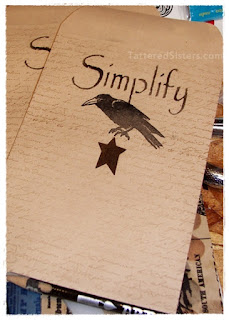
Primitive Crow Altered Envelope

I created some Primitive Crow Altered Art Envelopes in the past but I don't think I ever posted them here. I was thinking about doing some of these as gifts for a few friends, so thought I'd share them.

Primitive Crow Altered Envelope


 I just took plain brown Kraft envelopes and first stamped them with a text stamp using a golden-colored ink. Then I stamped on my Primitive Crows in black ink. Next I stenciled on my 'Simplify' text, and then I finished them off by gluing on a Rusty Tin star.

I will put some other handmade goodies inside...a hang tag or two, a magnet, and a little card. Whatever I can dream up in the studio!

24 April 2012

Primitive Jar Candle Freebie

Well, I enjoyed making yesterday's Primitive Freebie graphic so much I decided to make another one. This time it's a Primitive Candle in a Jar animated graphic. I've got this in two sizes for you.

Again, these are free for use on your website or blog. Just don't claim them as your own, sell them, or hotlink to them. Oh, and note the watermark on this one--it's from my new Tumblr blog, My Enchantments, because I posted it there first. Feel free to pop over and have a peek at it. If you like fairies, fantasy, and magic, you'll probably enjoy my blog. :)


23 April 2012

Primitive Candle Freebie

I'm doing something a little different today. I created a Primitive Freebie that I want to share with you, and this time the Primitive Graphic isn't a printable, but an animated graphic. And I've created it in 2 different sizes for you.

Tattered Sisters Primitive Candle
Tattered Sisters Primitive Candle B

Feel free to use these on your website or blog, but do not claim them as your own or sell them for profit. To save these, just Right-Click on your image of choice and then Save it to your computer. Please do not hotlink to these images or they will be deleted.

I love Primitive Candles, so I just thought it would be fun to create a Primitive Candle graphic. Hope you like it!

19 April 2012

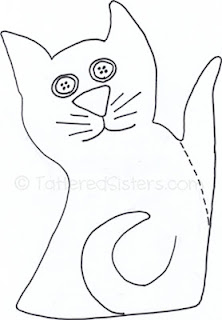
Primitive Cat Pattern

Those you who have followed me for awhile know that sewing isn't my favorite thing. It's not something I do often because I'm just not the greatest at it. And when I do sew it has to be something simple. But you all may also know that I'm not just a crafter, but also an artist (and a licensed art educator!) who likes to draw, among other things. So I decided to draw a little Primitive Cat, and I also decided it would make a great easy Primitive Pattern too. Mind you, I haven't sewn it yet. LOL But I will at some point. That isn't gonna stop me from sharing it with you though!

This is what the Primitive Cat Pattern looks like:

Primitive Cat Pattern Photo

And you can download it for FREE by clicking on the link below.


This pattern has two options for the tail, so you can choose if your cat should have its tail up or curled down in front of him (or her). Just cut it out whichever way you'd like your cat to be. The pattern is in PDF format so it will print full size for you.

It should go without saying that this is my original creation and should not be claimed as your own or sold for profit. If you want to share it, please do so by posting a link to this pattern directly from your website or blog etc. That includes pinning on Pinterest--there's a Pin It link at the bottom right of this post, so please use it if you'd like to share it that way.

How to Coffee-Dye Muslin

I recently coffee dyed some muslin for the first time. I have coffee dyed muslin bags many times using my Grungy Sauce Mix recipe that I shared in my Grungy Hang Tag Tutorial. But I had never actually coffee dyed muslin fabric, and I decided it was time to give it a go so I would have some grungy muslin on hand for craft projects. So I looked around online for various "recipes" and "how-to's" for doing this, and I ended up combining the basics of several tutorials to do my fabric. And I thought I would share that Primitive Tutorial with you.

What You Need
  • A hot pot of double-strength coffee, or enough instant coffee made to equal the same.
  • 1 TBSP Vanilla Extract
  • 1 Yard Muslin Fabric
  • 1 Cup of Soda Ash (*optional-see #1 below)
  • A Gallon of Warm Water (*optional-see #1 below)
  • Small Plastic Tub or Large Bowl (or a bucket)--something just big enough to hold the fabric covered with the coffee/water.
  • Rubber Gloves
  • A Large Spoon

Directions
  1. Now this first step is optional. But if you're wanting to help set your coffee stain to make it more permanent, this is an easy way to do it. Take your plastic tub and fill it with the water and the Soda Ash. Stir to dissolve the soda ash. Put your gloves on (soda ash can be irritating to skin). Add your fabric and soak for 20 minutes, then wring the water out of the fabric. Do NOT rinse the fabric. NOTE: Soda Ash is very inexpensive and can usually be found in craft stores wherever tie-dye supplies are sold. You can also order it online. Also note, Baking Soda is NOT the same thing. And you can skip this step all together if you want to.
  2. Empty the plastic tub and pour in your hot Coffee and Vanilla. Wear your gloves if you're worried about the hot coffee, or about getting the color on your fingers. Add the fabric into the coffee and stir it around a bit to make sure the coffee gets on all of it and get it submerged.
  3. How to Coffee Dye Muslin
  4. Soak your fabric for 10-15 minutes and then check it. Keep in mind that it will dry LIGHTER than it looks wet. If you want it darker, soak it for another 10-15 minutes. How long you soak it is really up to you. I soaked mine for about an hour or so. I know people who soak theirs overnight. If you're unsure how long to soak, do it with some swatches of test fabric first, soaking for various times. That way you can gauge how long it takes to get a color that you like, before you actually soak your full yard of fabric.
  5. Once your fabric is the desired color, remove it from the coffee bath. Mine was a bit too dark after a long soak, so I rinsed it in cold water. But rinsing is optional at this point so only rinse if you need to lighten it a bit. Again remember, the fabric will look lighter when it's dry than it does when it's wet. Wring out the fabric--wearing  your gloves (again, to avoid staining your fingers).
  6. Now you need to dry your fabric. You have three options: Air Dry, Oven Dry, or Dryer. If you choose the Oven Dry method, I would set it at no higher than 225° and lay the fabric on a cookie sheet, turning every 5 minutes (and keep an eye on it!). The oven method will add more grungy effects, which you can enhance by adding crumpled foil to your cookie sheet first. If you choose the Dryer, you may want to put the fabric inside an old pillow case first, in order to protect your dryer from the stain. If you use the Air Dry method, you can also enhance the grungy effect by using a hot iron on almost-dry fabric.
Coffee-Dyed Muslin
Air-Dried Muslin

Oven-Dried Muslin
Oven-Dried Muslin--with Wrinkles
Options
  • You can add Cinnamon (and even other spices, if you like) to your coffee dye for some added scent and color.
  • You can crumple the fabric before dying it to give it a more grungy look and add a sense of texture. You can also crumple it as it's hanging up to dry.
  • If you're making dolls or other projects, you can put your coffee dye mixture into a spray bottle and spritz some onto your project for some added grunge and texture.
  • Add some more age to your coffee dyed fabric by rubbing it with some sandpaper in spots to give it a more worn and aged appearance.
  • You can use tea instead of coffee to make your dye, but it will not usually get as dark. You can experiment with both to see which you prefer.
You can't really do this wrong because the "primitive look" isn't about perfection. It's about looking worn and aged, something you will achieve with the dye process. I hope you have fun making lots of primitive Grungy Goods with this tutorial!

15 April 2012

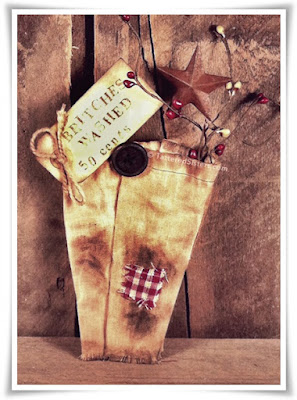
Primitive Britches

I was in my studio today and trying to recycle some leftover craft items into a new craft project. My main item was part of a grungy muslin bag that had the bottom cut off, which I was bound and determined to turn into something. So this is what I came up with: Primitive Britches!

Primitive Britches
All I did was some creative folding to make this partial muslin bag look like a pair of "britches." I hot glued the folds/edges together, added some extra grungy effects, glued on a gingham patch, and sewed on a button. I also distressed the bottom edge of the britches and added some Pip Berries and a Rusty Tin Star. I finished this off with a little grungy hang tag that reads, "Britches Washed 50 cents."

These Grungy Goods would look cute in a primitive laundry room, don't you think?

03 April 2012

Subscribing to Blogs

Recently I posted about how Google Friend Connect would be disappearing from non-Blogger blogs by the end of March. And there's talk, though unconfirmed, that it will disappear from Blogger blogs too by the end of the year. I have been using that gadget to subscribe to blogs for ages, and I've used it on my own blogs, both Blogger and WordPress. Of course, the gadget has disappeared from my WordPress blogs now. And it's come to my attention that many people don't know any other way to subscribe to a blog without using GFC. So I'm writing this little tutorial on how to subscribe to blogs without using GFC. This isn't just Blogger Tips, it's good for any blog platform.

First, you need to know that you can subscribe to a blog in (at least) 4 ways:
  1. Using Google Friend Connect (if they are on Blogger and if they use it), though who knows for how long.
  2. Via Email. Just look for an email subscription form on the desired blog. Mine is in the left sidebar. (See photo below) Mine is provided by Feedburner, but Blogger makes a Gadget for this too! An email subscription is awesome, because it sends every new post right to your email inbox.
  3. Via Subscription Links. I have these also, directly above my email subscription form. And Blogger makes a Gadget for these too! (See photo below).
Blog Subscriptions
   
  4. Manually, in A Reader. I use Google Reader myself, so my tutorial (below) will show instructions for a manual subscription using Google Reader.

Before I show those directions, if you're on Blogger, make sure you make it easy for people to follow your blog. Blogger has 2 Gadgets to help you do this, as noted above. One is called Follow by Email. And one is called Subscription Links. So just go into your Layout and add those to your sidebar, preferably near the top of the blog, to make them easy to spot. Who knows how many potential blog followers you have lost if you don't already have these gadgets on your blog!

Subscribe via Email Gadget

Subscribe via Feed Links


Now for the tutorial on Subscribing to Blogs in Google Reader.

Step 1
Find a blog you want to subscribe to. Then go up into your browser's address bar and copy the blog's URL. (Example: BlogILove.blogspot.com).

Step 2
Go to Google Reader and click the Subscribe button.


Step 3
Paste the blog URL that you copied in Step 1 into the box that appears underneath the Subscribe button after you clicked on it. Then click ADD.

Subscribe in Google Reader Box

That's it! You've just subscribed to that blog. Go ahead and try it. It's super easy. And when you're finished, be sure you check your own blog to make sure you have those subscription gadgets added to your own blog, so that you make it super easy for people to follow your own blog too! And hey, spread the word. If you didn't know how to do all this, I guarantee you there are many other folks who don't know how to either. So Pay it Forward. We bloggers have to stick together, right?

02 April 2012

Grungy Primitive Candle

This is a Grungy Primitive Candle in a Rusty Tin candle pan that I did for my living room. Don't you love Primitive Candles?

Grungy Primitive Candle

This was done the same way I did my Grungy Primitive Tapers and most of my other Grungy Goods, where wax-dipping and spice-rolling are used. When I finished getting it grungy, I just added a mustard homespun tie and a little sprig of Pip Berries for some color. Then I just put it in the rusty tin candle pan. Super easy and grungy primitive candle! Great to use anywhere in your primitive home.