31 May 2011

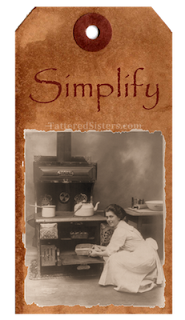
Simplify Hangtags Primitive Graphics

I've been kind of busy lately so haven't been able to blog as much on any of my blogs. I hate that! So even though I'm still busy and my blogging time is limited right now,  I wanted to make up for my absence by offering some primitive freebies in the way of some downloadable primitive graphics.

I created a set of 6 Simplify Hangtags in PNG format that you can download by clicking on the text link below the sample image. The file is a compressed Zip file since it is a rather large file. It should print 6 large hangtags on a full sized sheet of paper or cardstock, whichever you prefer.

Simplify Hangtag Sample
Click Here to Download Simplify Hangtags

Once you click on the link you should be prompted to either Save the file or Open it. Choose to Save it and then you can extract it once you have Saved it. Once you have it extracted you should be able to view and print it. If you have any problems shoot me an email by clicking on the Contacts link in the menu below my header and I'll convert it to a PDF file and send it to you that way. Hope you like the primitive hangtags!


post signature

17 May 2011

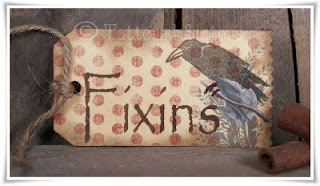
Primitive Crow Fixins Hangtag

I haven't been able to get into my studio much in the last month. But I made it in yesterday for a couple of hours and decided to do some Altered Art. This Primitive Crow Fixins Hangtag was one of my creations.

Primitive Crow Fixins Hangtag
I started with a tag that already had the polka dot pattern and a bit of "greenery" imagery on the bottom. I just liked the look of that pattern. Then I took some Tim Holtz Distress Ink and distressed all the edges, and even very lightly over the top of the tag. Next, I took a stencil I have that spells out Fixins and I used the same Distress Ink to stencil on that word. Then I stamped on my primitive crow image, and I added a paper image of some leaves and a twig, so it would look like the crow is sitting on it. I also used some paper edge scissors to add a decorative edge to the bottom of the tag. And I finished it off with a jute tie. 

Now wouldn't this look cute on a Grungy Prim Fixins Bag or some other Fixins gift?


post signature

16 May 2011

Heart n Home Dough Ornies

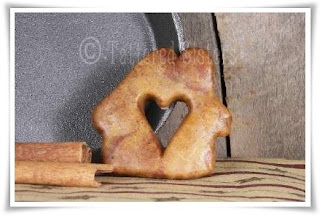
I really don't think there are any limits on the kind of Dough Ornies you can make. These primitive Heart n Home Dough Ornies are a perfect example.

Heart n Home Dough Ornie
I used my usual Primitive Dough Recipe to make these. And to create the shape itself I used a silicone candle mold. I love to use the silicone molds because the dough doesn't stick. And the mold I have for the heart n home shape has 4 shapes in it, so I can do 4 dough ornies at one time. I used to use a cookie cutter for these, and that just takes too long to do! The silicone mold makes the whole process go much faster.

Now of course these are just plain dough, but you could paint them instead of just dipping them in wax. Or you can do what I do when I want color on an ornie: use powdered tempera paint mixed in with the dough. Then no painting is necessary! But in that case I would seal with a clear acrylic spray, rather than dipping in wax. And these particular primitive ornies look really cute with a piece of primitive homespun tied to them too! Hang them somewhere, or use them as primitive bowl fillers for a cute prim touch.

post signature

10 May 2011

Rusty Tin Bucket Primitive Gifts

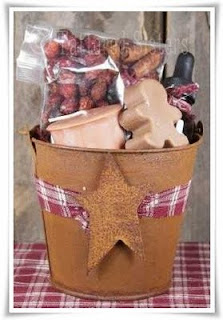
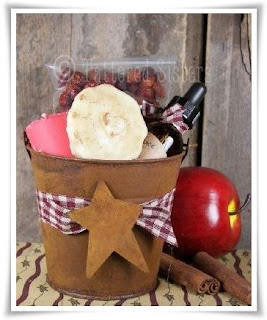
I really love working with Rusty Tin buckets, and making Primitive Gifts. So whenever I can combine those two things, I love that even more. I buy rusty tin buckets in all sorts of sizes. You just never know what size you might need, and you can do so many things with them. For my Rusty Tin Bucket Primitive Gifts, I use buckets that are about 4" high and almost 4" in diameter at the top. 

Rusty Tin Bucket Gingerbread

Rusty Tin Bucket Apple
For these gift buckets, first I tie them with some primitive homespun and add a rusty tin star for a fun prim touch. Then I add paper shred and scented goodies inside that all have matching scents (the first one is Gingerbread and the second one is Apple): a little sample pack of  Prim Fixins--in this case it's scented rosehips & cinnamon sticks, along with a soy votive candle, a soy wax melt, and a bottle of primitive refresher oil in the matching scent. I put the whole bucket in a clear cello bag and tie it with jute or matching homespun. It really is a fun little primitive gift!

post signature

09 May 2011

Country Primitive Sachet Recipe

When I had my online store I used to make and sell a LOT of  Prim Fixins, including sachets. They are super easy to make and very affordable, and they were always one of my best sellers. So I thought I'd share the how-to primitive recipe with you, in case you'd like to make some too.

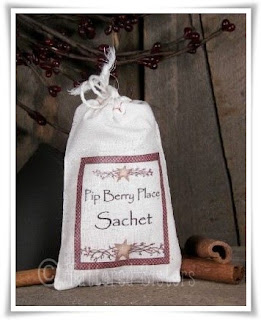
Primitive Sachet

Supplies
  • Crushed Corn Cob
  • Fragrance Oil
  • Glass Jar with a Lid
  • Muslin Bags (plain, or grungy them up first)
Let me start by saying that you have 2 options for buying the Crushed Corn Cob. 1) You can go online to a candle supply store and pay a fortune for it, or, 2) You can go into the pet supply section of the nearest Wal-Mart or other department store and buy it there super cheap. Personally, I always do the latter! They sell crushed corn cob as pet bedding for small animals, like hamsters and gerbils and such. But it's the same exact stuff that you can buy online at every candle supply store--only difference is you will pay them far more than you will if you just visit Wally World. So save yourself a LOT of money and get it cheap. Then follow the directions below.
  1. Put 2 cups of your crushed corn cob into the glass jar (I always use glass jars, because fragrance oil can damage many types of plastic).
  2. Add 1 ounce of your favorite fragrance oil--or a little more (you can adjust this to your liking).
  3. Cover the jar with the lid and shake well to mix. 
  4. Shake the jar off and on for 2-3 days to let the corn cob absorb as much of the oil as possible.
  5. Add crushed corn cob to your muslin bag and enjoy!
A word of caution: fragrance oil can damage finished wood and painted surfaces, so I always put a caution label on the bag so people will know that, as sometimes the corn cob is still moist and a bit of oil can damage those surfaces if it makes contact through the bag.

And as a helpful tip--the muslin bags can be made much more primitive-looking just by grungying them up first. You can use rubber stamps or even stencils to embellish the bags with some sort of text or images. But you can also do what I have done often (as shown in photo above) and create iron-on transfer labels for your sachets and just iron them on. I usually use PrintMaster to create labels, using iron-on transfer paper made for ink jet printers, and making sure to print my transfer in reverse (don't forget that!).

I use very small muslin bags for my sachets and they hold about 2 ounces of corn cob. So the 2 cups I mix up can make quite a few bags. These are great to put in drawers or closets, or even to hang in cars to keep things smelling good. They are also great as party favors because you can customize and personalize them for any occasion!


post signature