25 March 2013

Primitive Easter Egg Topiary

I figured I had time for one more Primitive Easter project before next weekend, so when I was in my studio over the weekend, I created this Primitive Easter Egg Topiary.

Primitive Easter Egg Topiary

All I did was take a plain plastic Easter egg and decoupaged it with some old newsprint tissue paper that I had on hand. Then I used stamping ink in brown and copper and dabbed it on all over the egg once it had dried. Then I added a homespun tie and a Rusty Tin star and hot glued the egg to a cinnamon stick. I put some Spanish moss in a small rusty tin bucket, and inserted the cinnamon stick. And that's all there was to it. :)

20 March 2013

Goodbye, Google Reader

Goodbye Google Reader

I've been using Google Reader for years to stay on top of my blog reading. I follow about 150 blogs at the moment (it used to be more), and Google Reader has always been my reader of choice for keeping up with them all. It's nice to have them all in one place, and I liked the GR format so once I tried it I just kept using it.

So imagine my surprise (and annoyance) the other day when I checked into GR and there was a message saying that Google Reader would be discontinued in July! Um, come again? What the heck are you doing to me, Google? You own most of the Internet, and yet you are constantly taking away things I love. First it was Google Friend Connect...now this?! Sigh.

Anyhoots, Google provided me with a link to be able to export the blogs I follow in GR using their Google Takeout service. So I have done that. There are many reader services that will let you import that file so you don't have to lose all of your favorite blogs when GR closes this summer. But I did a little, um, Googling, and found a couple of alternatives to GR that don't require any importing (as long as you do it before GR closes). The two I'm trying out at the moment are Bloglovin and Feedly.

Bloglovin Reader

Feedly Reader

Both of these reader services are very easy to use, and both allow you to connect ans sync with your Google Reader/Blogger Account with just the click of a button (no importing of files is necessary). Feedly has more of a magazine format and takes quite a bit of getting used to, but I do like it. It has a lot of options you can adjust for how you want the blog posts displayed. Bloglovin is a little more user-friendly and simple. 

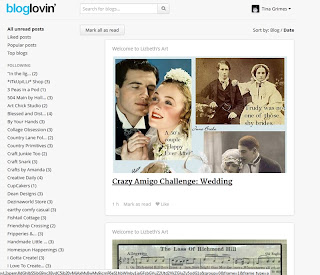
Here is a screenshot of my Bloglovin home page, so you can see how it looks:

Blogloving Home Page

And here is a screenshot of my Feedly home page, so you can compare:


So far, I'm leaning toward the Bloglovin reader because I think it's just simple, straightforward, and easy to use. It lists all the blogs I follow on the left side of the page, and I can sort them by Date or by Blog. And Bloglovin also generates Follow Buttons for you that you can place on your blog. I've already added mine to the right side of this blog (so be sure to follow me if you sign up with Bloglovin!)

Feedly is a little slicker, and has more display options, and even color themes for the layout, which is very nice. My followed blogs are grouped into my GR categories on the left side of the page (rather than individually). Both services let me connect to Facebook if I want. Both readers also have apps that you can download so you can easily follow your blogs on your mobile devices as well.

I'm going to keep using both of these reader services for now until I decide for sure which one I like best. Google Reader will be around until July, so we have time to take things for a good, long test drive. But I do suggest you start looking for your new service now, instead of waiting until the last minute. There are many other choices out there, people. I'm only listing two because these are the two I have tried. So do a little research and find the one that is best for you. :)

18 March 2013

Primitive Easter Bunny Tag

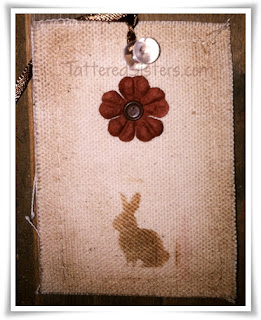
I was quite busy in the studio over the weekend doing everything from attempting to mosaic a rock, mixed media painting, painting jars, and this...my Primitive Easter Bunny Tag. I just wanted to create a very simple muslin tag that would work for a Primitive Easter gift. I was going to make a muslin bag to match, but haven't quite done that yet. 

Primitive Easter Bunny Tag

The "tag" is actually a muslin ATC blank I got at Michael's. They're really a perfect size to be used for Primitive Hangtags. (Michael's has burlap ATC blanks too, just FYI.) I grungy'd up the tag, then stenciled on a little bunny using Tim Holtz Distress Ink. Then I added a fabric craft flower with a button brad. I finished it by  punching a hole in the top and adding a brown ribbon.

So now I have a very simple (and easy to make) muslin hangtag to use on a gift. :)

11 March 2013

Bunny Butt in a Bucket

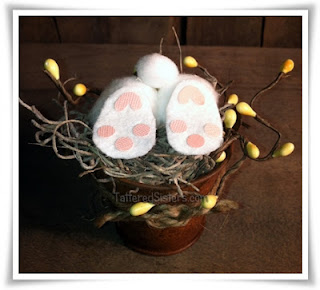
OK, I saw something like this on Pinterest over the weekend and I could not resist making one for myself. It's supposed to be a bunny jumping into a bucket, so all we see is his cute little Bunny Butt. 

Primitive Bunny in a Rusty Tin Bucket

I used a Rusty Tin bucket to create mine, along with some Spanish moss and some Pip Berries. The one I saw on Pinterest used all pom-poms and felt for the bunny, but I only had one white pom-pom in my entire studio (figures!). So I used cotton balls to make the bunny butt instead. I used white felt for the feet, and the pink toe pads are actually made from paper because I was out of pink felt too (naturally!). I think it turned out cute and it was super easy to make. These would make fun little Primitive Easter gifts. You could use tan pom-poms or pink ones, or any pastel color, or even gray! This could be a fun project to do with the kiddos too.

09 March 2013

Felt Chocolate Bunny Pattern

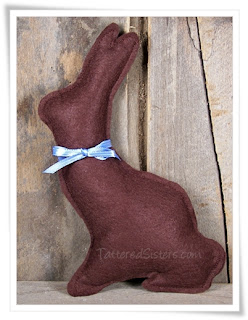
I created this Felt Chocolate Bunny Pattern and posted it on my Art Chick Studio blog a couple of years ago. We all know that pretty much anything can be made to look primitive, so I thought I'd share this pattern for anyone who wants to give it a try.

Felt Chocolate Easter Bunny Pattern

Just click on the text link under the bunny photo and that will take you to the PDF pattern. It's just the image of the bunny--there aren't instructions on it. It's basically just a matter of cut out two pieces, sew around the edges (leaving a small opening for stuffing), stuff with fiberfill, and stitch closed. I'm not an expert in the sewing department, so I like to keep it simple most of the time.

Hope you have a Hoppy Primitive Easter!

04 March 2013

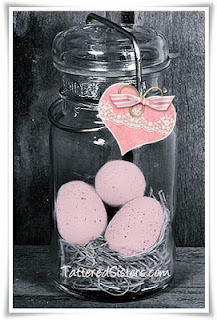
Primitive Spring Eggs

It's time to think spring y'all...Primitive Spring!

Primitive Spring Eggs in a Jar


All you need is a little color, and a little imagination...and then, even though it might be 36 degrees outside, it can still be Spring inside!