19 December 2011

Primitive Reindeer

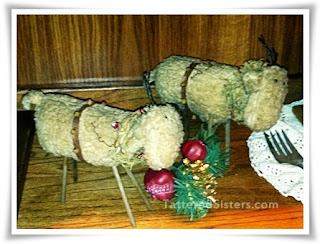
Time for sharing another little bit of my Primitive Christmas home decor. This time it's my Primitive Reindeer. Now these are not handmade; I got them while shopping at a prim store I used to go to in Fort Wayne before it closed. But even though I know they are mass produced little guys, I just loved the look of them and had to have them. They are fun Primitive Finds.

Primitive Reindeer

Now really, aren't they just too cute? They have little sticks for legs and they're kind of prim and grungy-looking. I so prefer handmades, but sometimes I see something like this and fall in love. And I keep thinking I'll use them as a pattern/guide to make my own one of these days. I'm so not good with sewing, but it'd be worth a try! Either that or maybe one day I'll come across some that are handmade by someone else and buy those instead.

post signature

12 December 2011

Folk Art Santas Home Decor

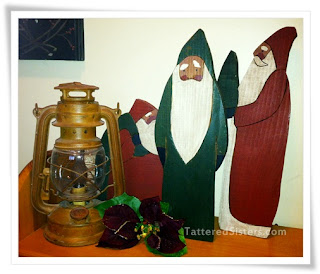
I thought I'd post a photo or two this week of various Primitive Christmas home decor items I have around the house right now. First up are these great Folk Art Santas I have.

Folk Art Santas
I actually found these at a garage sale at least ten years ago. Loved them as soon as I saw them. They look homemade and handpainted, and definitely my style of decor. Such perfect and wonderful Primitive Finds, I must say. This happy little trio sits on a table in my entry hall, greeting everyone who enters our home.


post signature

10 December 2011

Christmas Tree Hangtag

I promised two free Primitive Hangtags this week, so this is my second one. It's my Christmas Tree Hangtag, which I made using a vintage photo of a Christmas Tree. Just click on the image to view it full size, then right-click to save it to your computer.

Christmas Tree Hangtag

Remember that this appears larger on the computer/online than it will be when it's printed. That's just how things work where images are concerned. :) And also remember that all my freebies are free for your Personal Use Only. No commercial use/resale is allowed.

Hope you enjoy this hangtag and can use it on many Primitive Christmas gifts.

post signature

07 December 2011

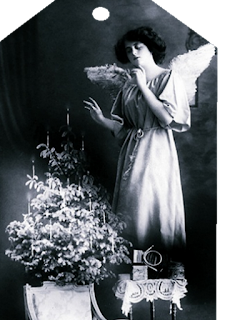
Vintage Angel Hangtag

I am all about the Christmas spirit and the spirit of giving at the moment. So to that end I've created more Primitive Freebies to share. This is the first of two Primitive Hangtags I'll be posting this week, both of which feature Vintage Photos. This one is my Vintage Angel Hangtag.

Vintage Angel Hangtag

Just click on the hangtag image above to open it to its full size. Then right-click and save it to your computer. Note that it will print smaller than it appears here (images always look bigger on the computer/Web than they do in print). Also remember that my Primitive Freebies are free for your personal, non-commercial use only and are not meant for resale.

Happy Holidays!

post signature

05 December 2011

Grungy Reindeer Ornie

Well you know I'm addicted to Grungy Goods, and I'm also always trying to find new ways to use supplies I already have, like muslin bags. I always have lots of those. So I came up with this cute little Grungy Reindeer Ornie.


I already had some grungy'd up bags on hand. So I used acrylic paint to add the reindeer's face. Then I used an extra grungy bag to cut out two ear shapes and used a hole punch to punch a hole in the bottom of each one. Then I stuffed the bag with fiberfill and pulled the strings tight. Next I added each ear by pulling the drawstrings through each one on either side, and I tied them and made a knot to hold the ears in place. Then all that was left was to use some Pip Berries to create his antlers.

Now I have a cute little reindeer to add to my collection of Primitive Ornies. And this little guy is hanging on my Primitive Christmas tree!

post signature

01 December 2011

Primitive Snowman Mitten Ornie

I was in the studio over the weekend and decided to turn a plain white mitten into a Primitive Snowman Mitten Ornie. I just love Primitive Snowmen!

Primitive Snowman Mitten Ornie

I just took a plain, white mitten and grungy'd it up with some Tattered Sisters Glimmer Mist--that's always the fastest way to grungy something up, and sometimes that's what I want. :) After I grungy'd the mitten, I painted on the eyes, nose and mouth using regular craft acrylics. Then I added the homespun fabric, a rusty bell, and a rusty hook hanger and it was all finished! And now it's hanging on my Christmas tree. 

post signature

30 November 2011

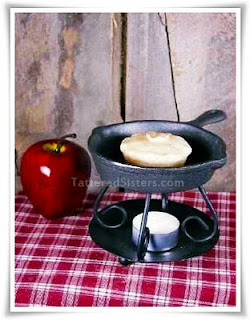
Iron Skillet Wax Warmers For Sale

I have some wonderful Iron Skillet Wax Warmers that I am listing for sale. Brand new and perfect for gifts this holiday season. These are available via Google Checkout using the Add to Cart button below for $12, plus $6.95 shipping for one warmer. Each warmer will come with a tealight candle and one wax melt. Note that the wax melt you receive will vary from what is shown in the photo.

Iron Skillet Wax Warmer


Google Checkout (now known as Google Wallet) is highly secure; I have used it myself for years with never a problem. You will need to register to purchase with their cart. I do not have access to your credit card information using Google and it is not stored on this blog. However, if you'd prefer to purchase using Pay Pal, I can send you an invoice or you can send me $18.95 directly in Pay Pal (which includes the cost of shipping). You can use artchickstudio at gmail dot com as the email address. If you'd like for me to send you a Pay Pal invoice, just click on my Contacts link at the top of the blog and shoot me an email that includes your Pay Pal email address.

If you have any questions please let me know!


post signature

Milk Bath Recipes

With the holidays upon us, I thought I would share some Primitive Recipes in December for country and Primitive Bath and Body products you might like to make yourself and give as gifts. It's still November as I type this, but I'll try to add a couple more recipes next month.

Milk Bath in a Milk Bottle


I'm starting with a Milk Bath recipe. I made a few different types of  Milk Baths when I had my retail store and online store too. You can easily Google "milk bath recipe" and get lots of ideas. But the three I'm listing below will give you a place to start. And my photos show you  a couple of ways that I packaged my Milk Bath powder.

Milk Bath Plastic

Milk Bath with Oatmeal
  • 1 Cup Corn Starch
  • 2 Cups nonfat Dry Milk powder
  • 1/2 Cup Baking Soda
  • 1/2 Cup finely ground Oatmeal
Process the Oatmeal in a blender or food processor. And Milk powder and mix. Pour into a bowl and add the remaining ingredients, and mix well. This makes about 4 cups of Milk Bath.

Buttermilk Milk Bath
  • 1/2 Cup nonfat Dry Milk powder
  • 1/2 Cup Dry Buttermilk
  • 1 Cup fine Sea Salt
  • 2 TBSP Cornstarch
Combine all the ingredients in a bowl until they are well blended. This makes about 2 Cups of Milk Bath. Note of caution: dry buttermilk can be stinky! This is not meant to a fragrant bath--it's designed for skin-softening only. You could always increase the dry milk and decrease the buttermilk if you find the buttermilk's odor too overpowering.

3 Ingredient Milk Bath
  • 2 Cups nonfat Dry Milk powder
  • 1 Cup Sea Salt (or Epsom Salt)
  • 1/4 TSP of Skin-Safe Fragrance
Mix the milk powder and the salt, then add the fragrance and mix until well combined.

Directions for use of Milk Baths: Use 3 TBSP or more to bath water to smooth and soften your skin.


post signature

29 November 2011

Primitive Snowmen Hang Tags

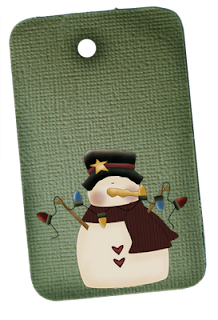
I got a request from a prim sister at A Primitive Journey community for a primitive hangtag with a snowman on it. So after playing around a bit I decided to do one better and create two Primitive Hangtags with snowmen! Just click on the images below to view them full size. Then right-click and save them to your computer!

Primitive Snowman Hangtag Green

Primitive Snowman Hangtag

As always, these Primitive Freebies are free for your personal, non-commercial use. They are not to be used for resale purposes. And thanks to Gail at Country Life Graphics for the perfect and adorable Primitive Snowmen graphics!
post signature

09 November 2011

Uses for Vintage Wooden Spools

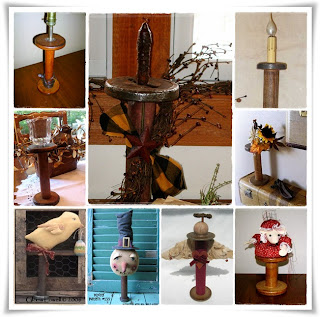
A reader asked me for some ideas for using Vintage Wooden Spools today. I put a lot of thought into it, and made good use of Google, and found lots of inspiring ideas. So I thought I'd share those ideas with all of you, in case anyone else might be interested in this too.

Wooden spools are such wonderful Vintage Goods and are relatively easy to find at antique stores, garage sales, estate sales, and craft shows. They are great for repurposing to be used for Primitive Home Decor. The most obvious use of these great Primitive Finds is as candle holders. But in case you need some more ideas, I've created a collage from photos I found on the Web. And below that you'll find links to the websites where you can find these Vintage Wooden Spool creations. (Be sure to click on the image to view it full size.)

Vintage Wooden Spools

Of course, there can be many other uses for these types of wooden spools. If you have some other ideas, leave a comment and share. Would love to get some more creative inspiration! With the holidays upon us, you might be able to use some of these ideas to make some fabulous primitive Christmas gifts!

post signature

07 November 2011

Primitive Crow Homespun Fabric Hangtag

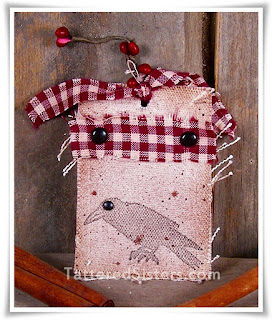
I was in the mood to do something with fabric yesterday. Then I remembered I had some fabric ATC blanks that I hadn't used yet so thought I'd use one of those to create a Primitive Hangtag.

Primitive Crow Fabric Hangtag

First I grungy'd up the tag using some Tattered Angels Glimmer Mist--always a nice, quick way to add a grungy effect. Then I stamped on a Primitive Crow design. I added some homespun across the top portion using some black paper fasteners, and I added one to the crow too to look like an eye. Then I added some extra homespun to the top of the tag and added a little spring of Pip Berries too.

I love the way this turned out. It will be perfect for a primitive gift this holiday season!

post signature

24 October 2011

Little Witches Tea Party Photo

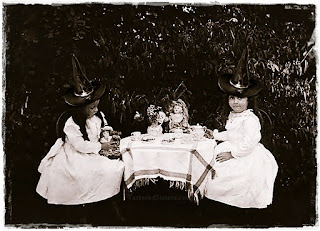
Just one more Primitive Freebie for today. I've been going through all my Vintage Photos and couldn't resist playing with this one too for a freebie. A Little Witches Tea Party photo for you.

Little Witches Tea Party Photo

That's just too cute for a Primitive Halloween craft project or gift tag. Just click once on the image to open it to its full size, then right-click on it to save it to your computer. And as always, this is free for your personal use only...it may not be used or sold for profit.

post signature

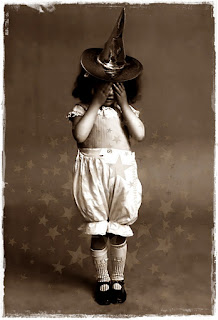
Peek-a-Boo Witch Photo

OK, so I'm in digital mode right now and felt like playing with some vintage photos to make some more Primitive Freebies for you for October and that will be a perfect touch for your Primitive Halloween crafting...especially if you love to use Vintage Photos in your crafting like I do. This first one is called Peek-a-Boo Witch. As you can see, it's a cute little witch girl playing peek-a-boo.

Peek a Boo Witch Photo

I've added a couple of digital elements to jazz her up a bit for the holiday. This was such a cute image I couldn't wait to do something with it, so though a witch hat would be perfect for Halloween. Who knows...maybe she's playing Hide and Seek with some little witch friends.

Click on the image to enlarge it to full size, then right-click to save it to your computer. And, as always, this image is free for your personal crafting needs. But it is not allowed to be used or sold for profit.

post signature

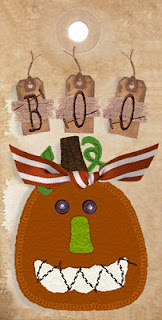
Pumpkin Jack Tag Freebie

I love Primitive Freebies, don't you? That's why I like to make some freebie hantags and Primitive Graphics to give away here at Tattered Sisters from time to time. And since it's still Fall, I'm sticking with pumpkins. So I've created this Pumpkin Jack Tag freebie for you.

Pumpkin Jack Tag Freebie

Click on the image to open it full size. Then right-click on the image to save it to your computer. Remember that my freebies are free for your personal use only. They cannot be used for commercial purposes/resale for profit. Hope you like it. Enjoy!

post signature

17 October 2011

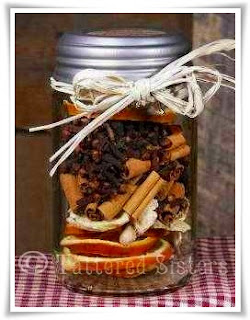
Ginger Citrus Simmering Spices

If you liked my Spiced Cider Simmering Spices recipe, then you might like this one too: Ginger Citrus Simmering Spices. It's easy to make and will make a great addition to your Primitive Recipes. (Note: this is not a beverage...it's like potpourri and is only meant to be enjoyed as a way to scent your home.)

Ginger Citrus Simmering Spices
These make the perfect Primitive Gifts, great as hostess gifts or just something to surprise a friend.

Ingredients
  • Dried Orange Slices
  • Ginger Root chunks
  • Cinnamon Sticks
  • Whole Cloves
  • Whole Allspice
You will also need your choice of Mason Jars and some raffia for the jar lid.

You don't need any precise measurements for this recipe. It's really just about layering each of the ingredients until you get to the top. I always start with 3-4 orange slices, then add a few pieces of ginger root, then the cinnamon sticks, cloves and allspice. I also add either a hangtag to the back, or a sticker to the bottom with directions for simmering. They can be added to a simmering potpourri pot, or to an old pot on the stovetop. Notice I don't add any fragrance oil to this recipe; it's all natural so it can't hurt the pan used for simmering. The ingredients just need to be covered with water and simmer on low--remembering to always check the water level! The smell is fabulous. Perfect for fall.

Note: I don't dry my own orange slices. I buy all my ingredients from suppliers listed on my Primitive Crafting Supplies page.

post signature

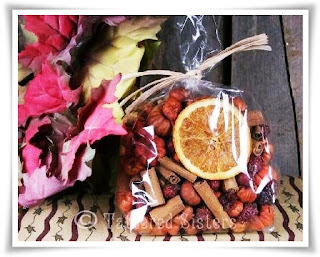
Fall Fixins

I love Prim Fixins, as so many of us do. I always have some sitting around in a bowl or a jar somewhere this time of year, especially if they are filled with all the colors of Fall. So I thought I'd just show you a little packaging idea for giving some Fall Fixins as a gift (or even to sell).

Fall Fixins
You can use any Fixins you like, of course. But in the photo I've just used rosehips, cinnamon sticks, and putka pods, scented in Pumpkin Pie scent. I've also thrown in some dried orange slices for an extra pop of color. They always look so nice in a bowl with the fixins. Of course, you could add Dough Ornies if you like to add another prim touch. Then I just put it all in a clear cello bag and tied it with some raffia. You could use the tried and true primitive standby, homespun, because that always looks cute and prim. I also always put a tag on the back with a little caution notice about the fragrance oil, since it really isn't meant to be in contact with painted or finished surfaces.

You could also put these in a jar, like I did the Primitive Putkas in a Jar. That always makes for a great presentation. No matter what you do with your fixins, they are a great touch for your  Primitive Fall decor.

post signature

25 September 2011

Primitive Birdhouse Find

I spent the day with the Hubs doing a little shopping on Saturday, and I was so lucky to come across a great Primitive Find at Hobby Lobby. It's this wonderful country Primitive Birdhouse.

Primitive Birdhouse

How is that for cuteness? The colors are exactly what I love for my Primitive Home Decor, whether it's inside my house or outside. For now I've got this sitting on an old milk can on my side porch. I may move it at some point, but for now I am just going to live with it there for a bit and see how it fits.

post signature

22 September 2011

Grungy Primitive Pumpkin Ornie

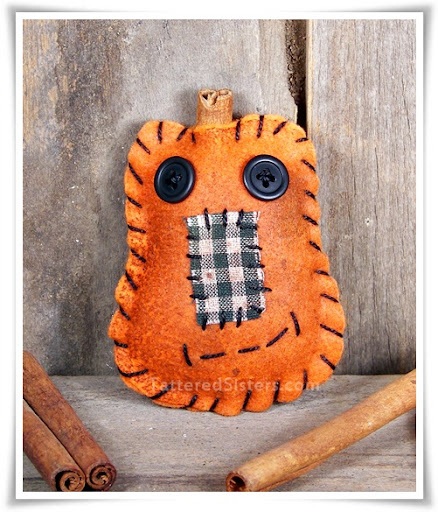
OK, so I guess I really must have pumpkins on the brain! But hey, it's Fall, right? If it were February, then I would be worried about this old brain of mine. I decided to make this Grungy Primitive Pumpkin Ornie out of felt. 

Grungy Primitive Pumpkin Ornie

I drew a pumpkin shape and traced it onto cardstock to create my Primitive Pumpkin pattern. I used that to cut two pieces of felt into my pumpkin shape. Then I sprayed my felt shapes with Tattered Angels Glimmer Mist, in Coffee Shop color. It's a great, quick way to add a grungy effect if I don't feel like messing with my usual Grungy Sauce mixture. And it's great for small projects like this one, which is only about 3-3/4" long. You know how much I love Grungy Goods by now, so making stuff grungy is always fun for me. And it's perfectly primitive too!

After drying the felt it was time to add the face. I used buttons for the eyes, and a scrap of gingham homespun for the nose. Then I just sewed on a crooked little smile. To the back half of the pumpkin shape I sewed on a piece of cinnamon stick to be the stem. Next I started sewing the pumpkin body together, until I got 3/4 of the way done. And then I stuffed the body with fiberfill and sewed it closed.

Another cute and fun project to add to my collection of Primitive Ornies.

post signature

21 September 2011

Pumpkin Jack Dough Ornies

Amazingly, this is going to be my 100th Post! Hard to believe I've posted that much already. But hey, yay! Some people post a lot more than I do, and some a lot less. So I'm not sure if 100 posts in 10 months is really any sort of accomplishment. But it's a milestone, so I'll take it. :)

I am going to be in Primitive Fall mode until after Thanksgiving, I'm sure. That's about how I roll anymore. So I'm doing as much Fall crafting as I can (though sometimes, that's not as much as I'd really like!). This time I'm serving up some Pumpkin Jack Dough Ornies. Dough Ornies have always been a favorite of mine, so it's fun to make them for every season, don't you think?

Pumpkin Jack Dough Ornies

These Pumpkin Jacks are about 2-1/2" to 3" around. These could easily work well thrown in a bowl of Prim Fixins. They are great as actual hanging ornies too; you can even add them to the top of a gift box. I use silicone candle molds to make them (and in case you're wondering, I don't remember where I got the molds). And these are just made with my Primitive Dough Recipe. You could also paint them. Or you could save yourself some work and add powdered orange tempera paint to your dough before baking and then the pumpkin jacks will already be orange when they are baked. That's a real time saver! Then all you'd have to paint really are the features. But heck, they're primitive, so you don't have to really paint anything!


post signature

12 September 2011

Rusty Tin Star Hangtag

One more tag to post for today. Since I usually do the usual rectangular tags, I decided to make a round one this time and I used Rusty Tin stars as my inspiration for this Primitive Hangtag. And hey, some Pip Berries always add that little touch of primitive we all love too. Click on this tag to open it to full size, then right-click and save it to your computer.


There's not pre-set hole at the top of this tag, so you'll have to punch one yourself. Sorry about that! And again, please remember that my freebies are for personal use only.

post signature

Fall Pumpkin Tag

I haven't been too super crafty the last week or so, but wanted to add something to the blog. So I decided to create a couple of Primitive Hangtags to add to my Primitive Freebies category. This first one is just in time for any Primitive Fall gifts you might want to give. Click on the image to view the full sized version of the tag. Then right-click and Save the image to your computer.

Pumpkin Leaf tag

Also just a reminder...my freebie graphics are NOT for commercial use. They are free for your own personal use, but they are not intended to be reproduced for sale or profit in any way. I am creating these as a kindness. It takes time a good deal of time and care to create them, and I am happy to do so. But only if you are taking them for personal use. If I start to see my custom tags appear for sale on any websites, I'll have to stop making them, and I would hate for that to happen. So please respect my wishes where these freebie graphics are concerned, so that everyone can continue to enjoy them.

post signature

07 September 2011

Spiced Cider Simmering Spices

Now that cooler temperatures are trying to sneak in, I can really start thinking about Fall, and Fall scents for my home. One of my favorite things about Fall and winter is scenting my home with my favorite scents. In the Fall, I especially love the smell of Spiced cider. It's one of my favorites. So here is a quick and easy Primitive Recipe for my Spiced Cider Simmering Spices. (Note: this is not a beverage...it's like potpourri and is only meant to be enjoyed as a way to scent your home.)


Now this recipe is simple because there aren't precise amounts of anything. You can use whatever amounts you'd like of each ingredient, based on your preference, and the total amount you're trying to make. And you can add your own additional ingredients if you'd like, or leave out things you may not like. It's totally up to you. But here's what I use.
  • Dried Apple Slices
  • Bay Leaves
  • Whole Cloves
  • Star Anise
  • Cinnamon Sticks (small chunks or large, your choice)
  • Crushed Corn Cob (this is used to help absorb the fragrance oil since some ingredients are less porous than others--so it will help maintain the scent)
  • Fragrance Oil, Spiced Cider scent
I just mix these ingredients in the amounts I want to fit in whatever pan or simmering potpourri pot I'll be simmering them in. I add the ingredients to a glass bowl and then drizzle in a couple teaspoons of the fragrance oil and stir it up well. Always do a little oil at a time, especially if you're only making a small amount of simmering spices. You don't want to add too much. Then I put it all in a glass jar for a few days to cure.

When you're ready to simmer, just add the simmering spices to your pot or pan with some water and simmer away. You can totally simmer these spices on the stovetop if you don't have a potpourri pot--but be sure to use an old pan. Any time you use fragrance oil you want to use an old pan, because the oil could ruin it. Also be sure to check your water level regularly so that it doesn't evaporate away. I always use just enough water to cover the spices. 

These Prim Fixins are just the perfect way to make your home smell like Primitive Fall has arrived! You can also make batches of this and package them up to give as gifts, or to sell too. They'd make great hostess gifts at a Fall party.

post signature

25 August 2011

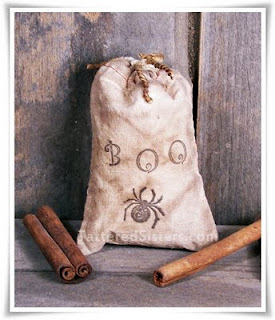
Grungy Boo Bag

Now I don't tend to do a lot of Primitive Halloween crafting. I much prefer Primitive Fall crafting instead. But I was creating some other bags to post on my Art Chick Studio blog and came up with this to post here for my prim sisters. It's my Grungy Boo Bag.

Grungy Boo Bag

By now you know how much I love to create Grungy Goods, so any time I come up with something to add to my collection of grungy ideas, I'm a happy camper. I used my Grungy Sauce Mix recipe that I posted in my Grungy Hang Tag Tutorial to grungy up a plain muslin bag. Then I just used black ink to stamp a spider image and lettering on the bag, to spell out BOO!

These would be perfect as little treat bags; fill them with candy corn or any kind of sweet treat. They would also be great as bowl fillers or hanging off of a peg rack, or sitting on a shelf. And of course you could stamp them with all sorts of designs and saying, and you could dye the bags different colors. There are lots of possibilities!

post signature

24 August 2011

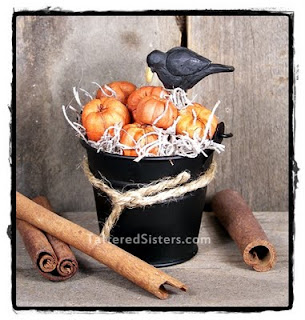
Primitive Pumpkin Bucket

Now this was just totally for fun, because I was determined to find another way to use my putka pods AND create another Primitive Fall project. The result is my little Primitive Pumpkin Bucket, accented with the cutest of Primitive Crows.
Pumpkin Bucket
I started with a plain mini black bucket, approximately 2" or so in diameter at the top. I added some fiberfill to the bottom and covered that with a piece of cardboard that I cut to fit very snug inside the bucket, just below the ridges on the bucket. I shoved in the cardboard and the ridges basically hold it in place. I did this because I knew I'd be hot gluing the putka pod "pumpkins" in, and I didn't want to have to do more than necessary. Those little suckers are small, and that takes a lot of time! So the fiberfill and cardboard barrier gave me a way to use less putkas. 

Next I took my primitive crow pick that I bought at Blossom Bucket (probably 3 or 4 years ago!) and cut the wire to the length I needed, so that the crow would sit a bit above the top of the bucket. I poked it through the cardboard and fiberfill where I wanted it to be. Then I started hot gluing in putka pods, one at a time. I just kept going until I created a nice little mound, and made it look like the crow was perched on the pumpkins.

To finish it off I just shoved in some Spanish moss here and there, to make it look like hay or something dried. And I tied a piece of jute around the bucket to help offset the black of the bucket and give it a bit of a rustic touch. I just love how this turned out.


post signature